How to Receive Payments on Your Course Website

With paid courses, you can receive payments via students’ accounts, update payment statuses manually, or add a payment widget to your website.
In this article, we will talk about how to receive payments on your site and enable users to quickly sign up for your paid course.
How to Configure Pricing Settings
Note that you will not be able to change your course price once it's been launched. If you need to change the price of a launched course, you can duplicate its content into a new course and set your new price for it.
Go to the “Settings” tab, and select “Paid” in the “Pricing options” field.

Select a Payment Method
Select a payment method from "Account Settings" > "Accept Payments." Set a value using the selected currency.
Read more about how to connect different payment methods in the "Accept Payments" section.

Add a Payment Confirmation Page
To retain users on your website, you can add a page where you will redirect them after payment. You can set up one link for all methods, or add individual links for each method. To do this, select the "Add a redirect link" checkbox under a method name.
Note that not all payment systems allow you to redirect users to your website after payment.

Create CRM Deals
To create deals with a certain deal status automatically, turn on the “Create a deal in CRM” toggle.

You can set a shared name for all course-related deals or a dynamic one using your linked variables: {course_name}, {date}, {time}, {first_name}, {last_name}.

Once you finish with these settings, start configuring your payment widget. Make sure that you selected the same method in your widget and course settings.
How to Add a Payment Widget to a Website
Choose or Create a Course Page
You can edit an existing registration page or create a new one.
In the "EDU" section, go to the necessary course, click the arrow in the upper right corner, and select “Edit website.”

To add a new page, go to the "Websites" section, find the necessary course website, and click Add page.
Read also: How to Add an Extra Page to Your Website.

Also, here you can edit an existing course page, click the three dots icon next to its name, and select “Edit.”

Add a Payment Widget
In the "Widgets" section, select "Payment.” Place the widget, for example, right after your course program.

Customize Your Payment Buttons
In the “Product” field, select “Courses from the EDU section.”

In the next field, select a course for which you want to receive payments from the drop-down list.
The list includes only paid courses. Price and payment methods are the same as in your course settings.
You can also change your course settings if, for example, your course offers several payment methods, and you need to disable some of them.
Read more: Pricing Options.

Customize your form fields — all of them will be required.
Read more: How to Add a Payment System to Your Website.

How to Add a Payment Gateway to Your Pop-up
You can also allow students to pay for your course right in your pop-up and add this widget to your website. Go to the pop-up builder, and in the "Target action" field, select "EDU payment."

Select a course for which students need to pay.

Select a payment method, and enter a payment button name.
Note: you can choose a payment method only if you have previously selected it in the course settings.

Contacts are saved to your CRM system after each payment. When adding a deal, you can choose its name, pipeline, and deal stage.

How Students Can Pay Online
When a user clicks the button, a modal window with a form will open. The personal information they specify will be saved to their CRM contact card and student’s card in EDU that will be created after they click the button.
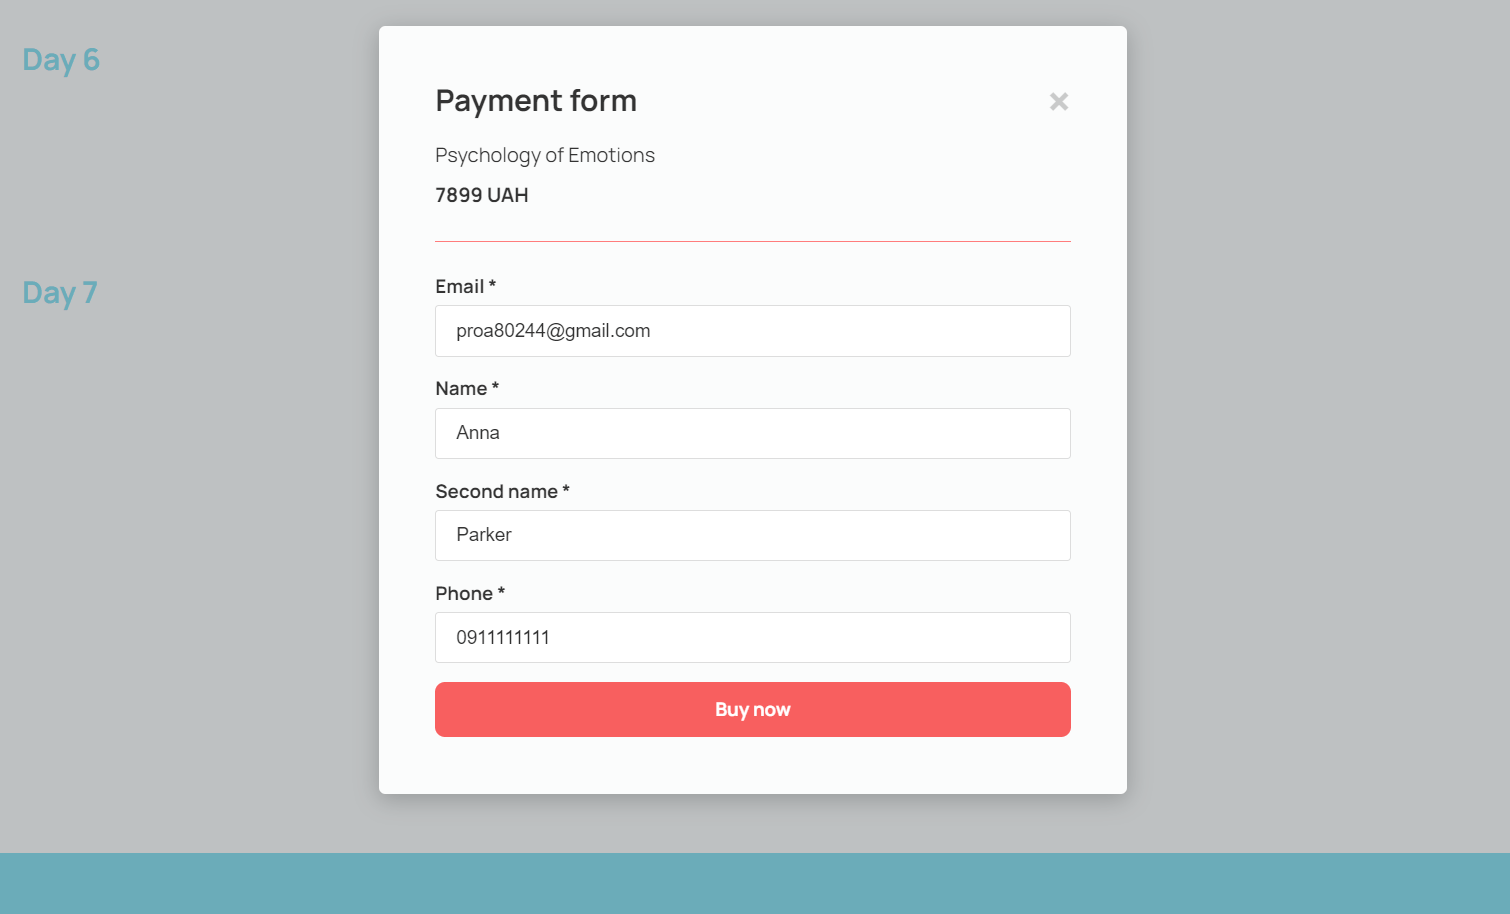
When the user fills out all the required fields and clicks the button at the bottom of your form, they will be redirected to your payment page, where they can enter their card details and pay for your course.
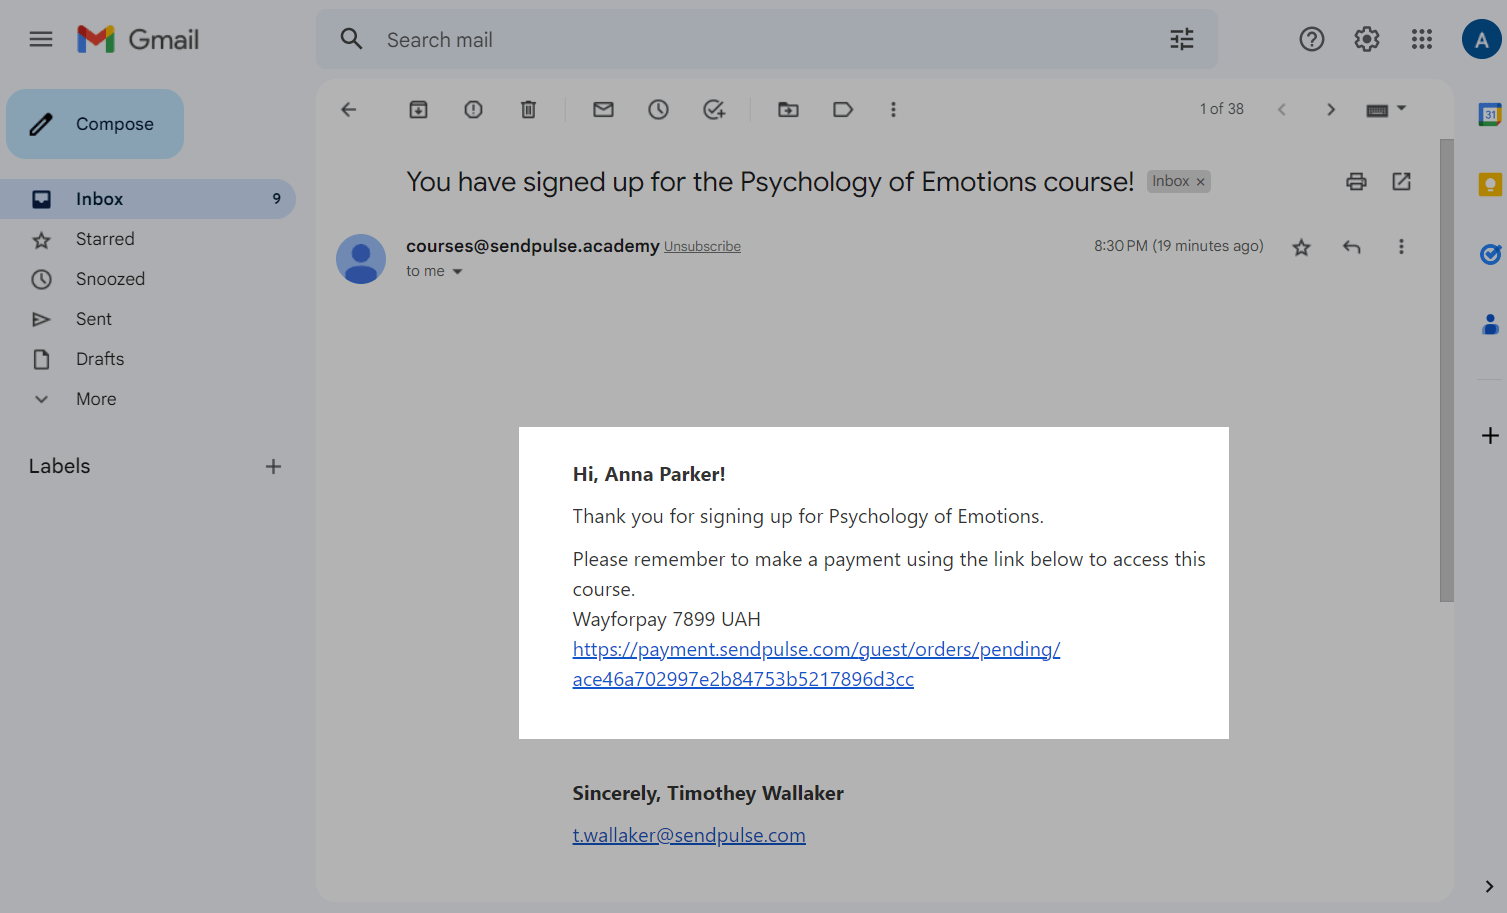
When users successfully pay for your course, they receive the login and password to their student account to the email address they specified in your form.
If the user filled in your form fields, clicked the button, and did not pay for your course, they will receive an email notification with a link to the payment page.
How to View a Payment Status
Instructors can monitor students’ payment statuses ("Paid" or "Not paid"). To do this, hover over the dollar sign next to a student's name.

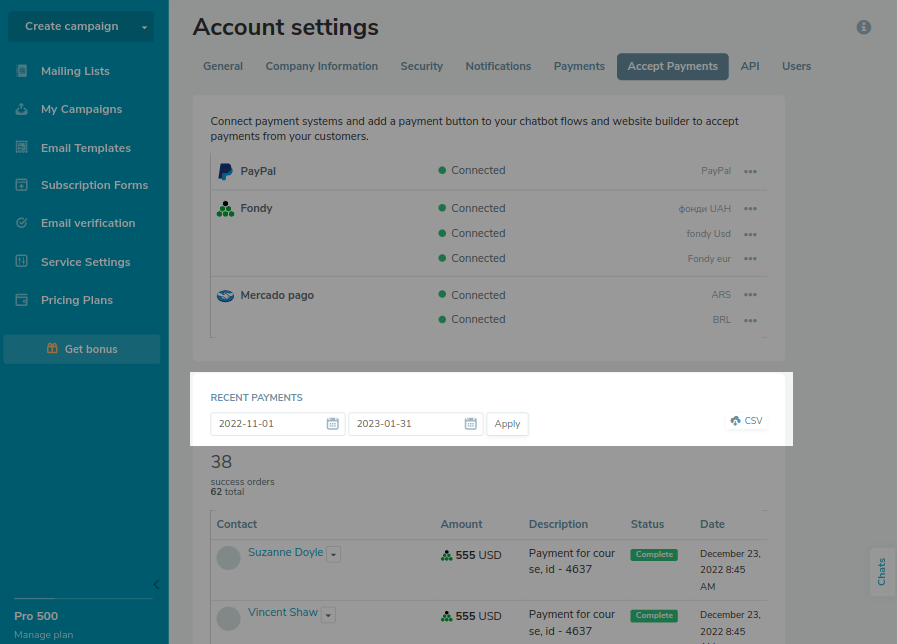
You can also view the status of each payment on the payment methods page. Go to "Account settings" > "Accept Payments." You will see a student’s username, product name, price, recent status change date, and payment status.
Once the user successfully pays for your course, the money will be credited to your account.
Also, you can monitor your overall payment statistics for all courses in the "Payments" section or view each course’s statistics separately.
Read more: Payment Statistics.
Last Updated: 16.08.2023
or