How to Create a Chatbot with a Booking System in Google Sheets
The Integromat service has changed its website address, design and name to Make. The integration options remain the same, but the design may differ from the screenshots shown in the article.
You can integrate SendPulse chatbots with other services to request information via Make. In this article, we will look at how to create a booking system using a chatbot for a car service station. You can register a customer to service the car for a specific time if the desired cell is empty or suggest a different time and day if it is booked.
You will be able to automate and optimize the booking process and use this scheme to register users at a car service station, make an appointment with a doctor, book tables at a restaurant, and so on.
How to Get Started
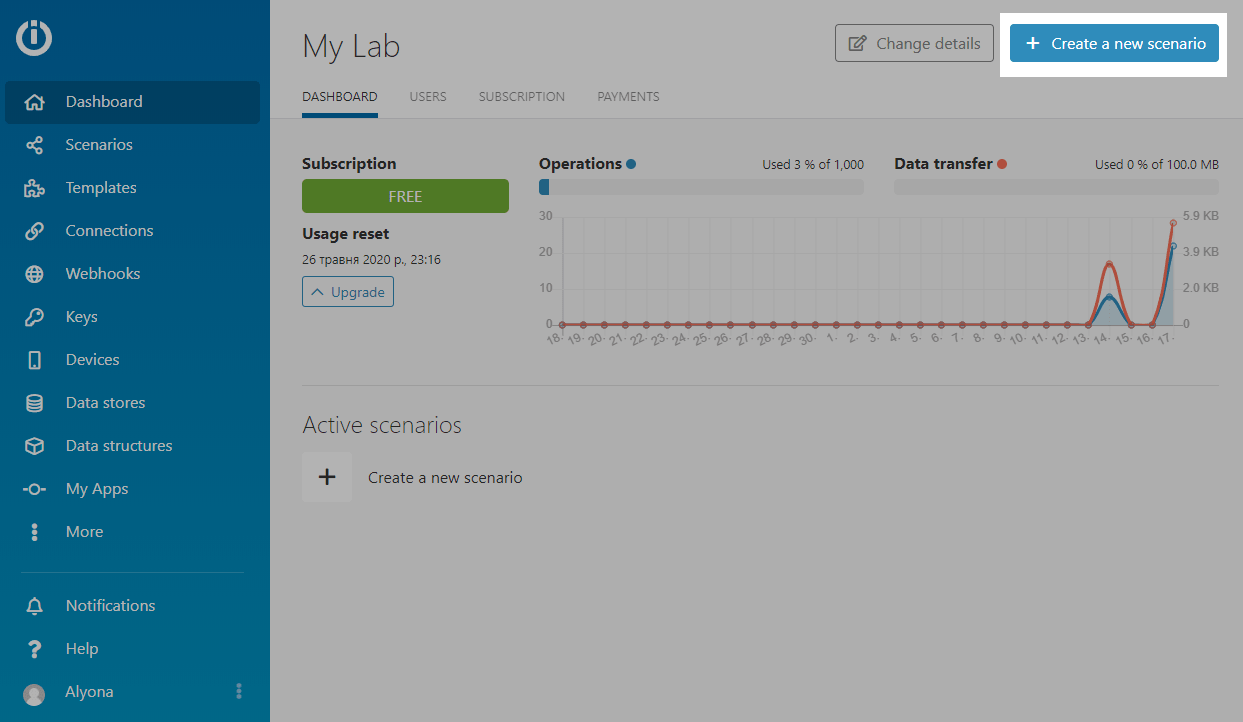
Log into your Make account, and click the + Create a new scenario button to start creating a scenario.
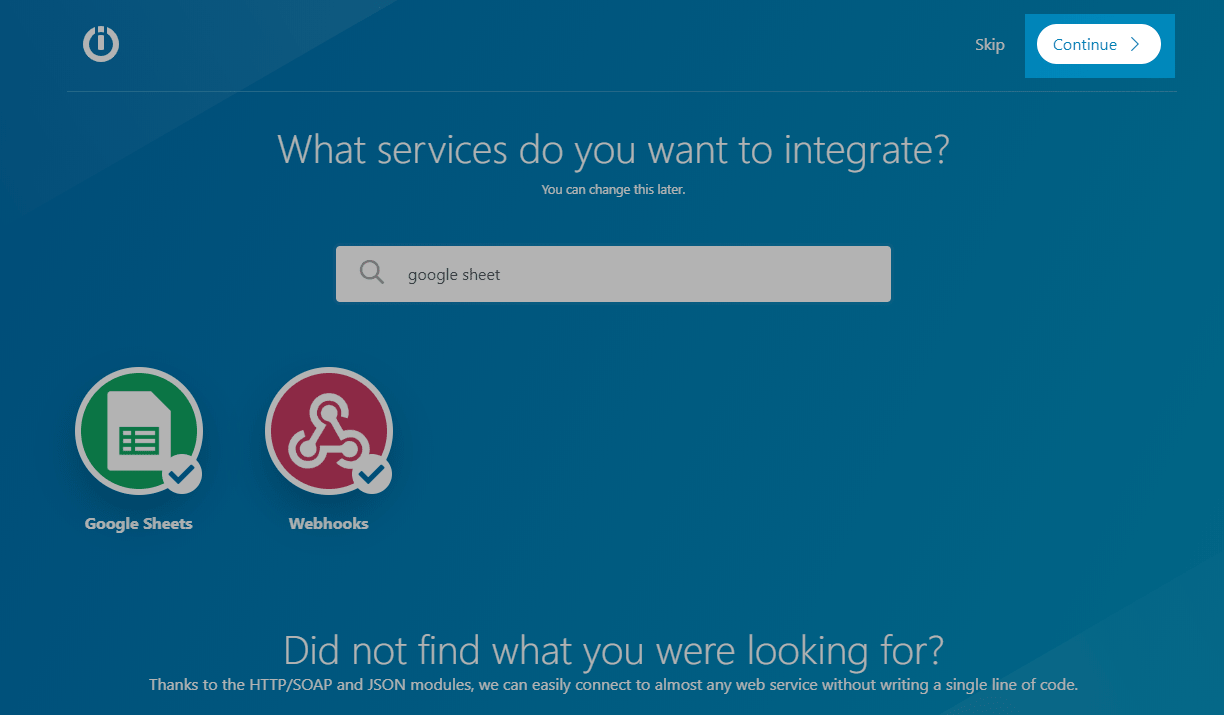
You can choose which services to connect — in this case, we want Webhooks and Google Sheets — using the search or find and add them directly in the constructor. Click the Continue button in the upper right corner.
How to Create a Webhook
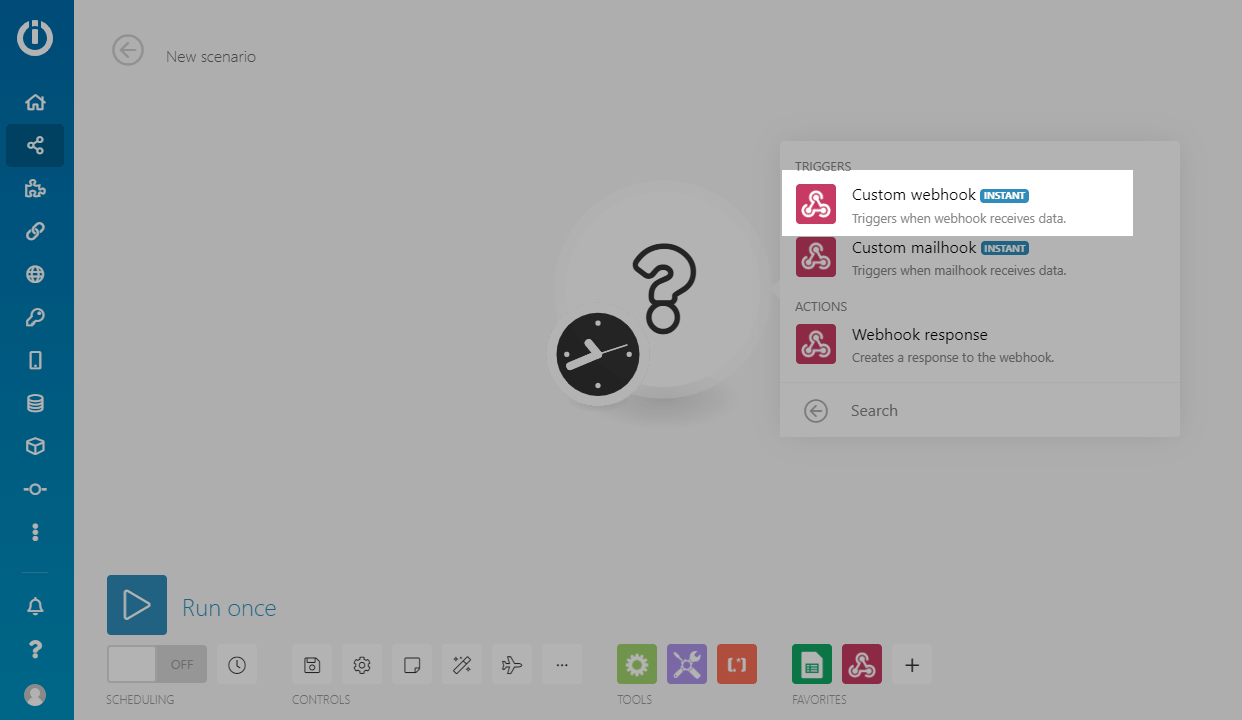
Click on the block with the question mark at the center of your screen and select the "Webhooks" block — this block starts the flow.
You need to create a webhook that sends data from your chatbot flow. Select the "Custom webhook" block from the drop-down list.
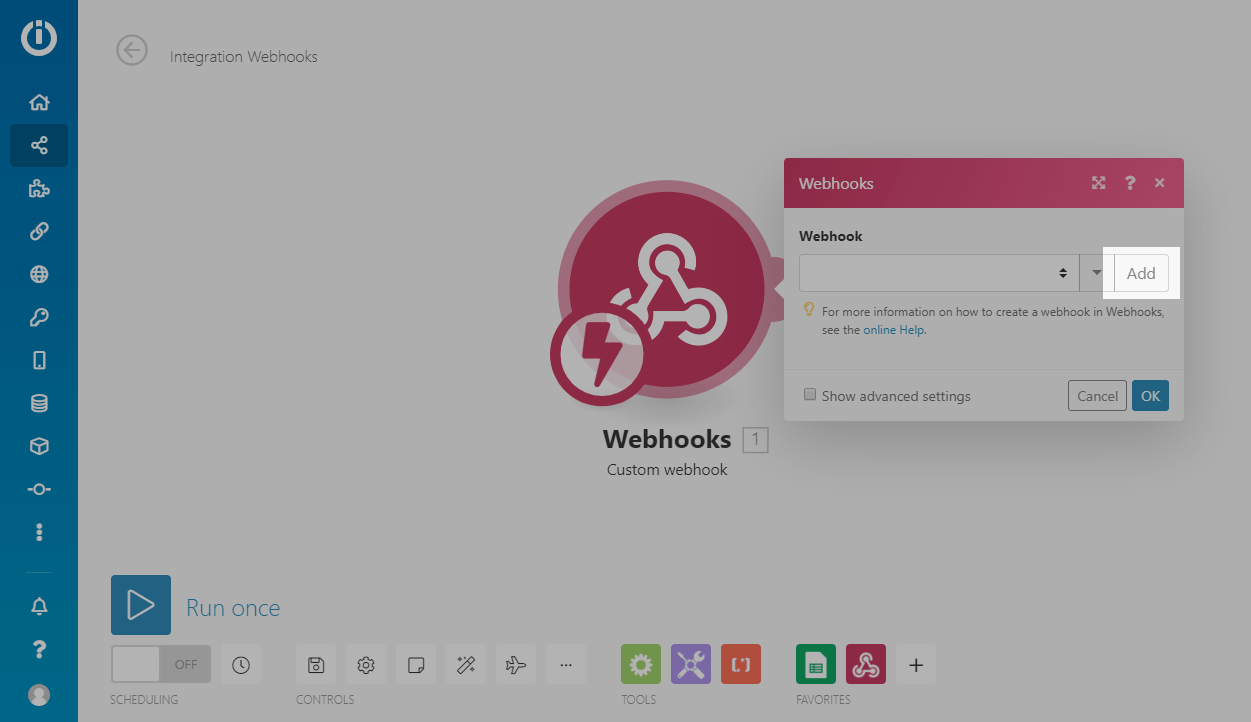
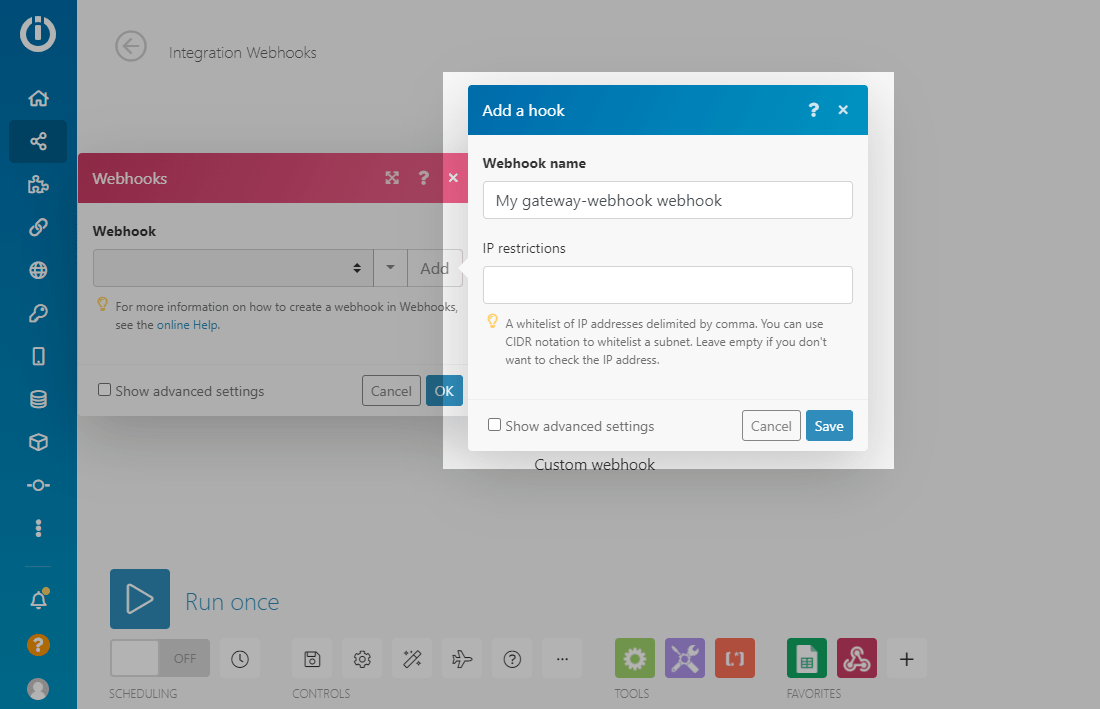
Click the Add button to create a new webhook.
Enter a webhook name and click the Save button.
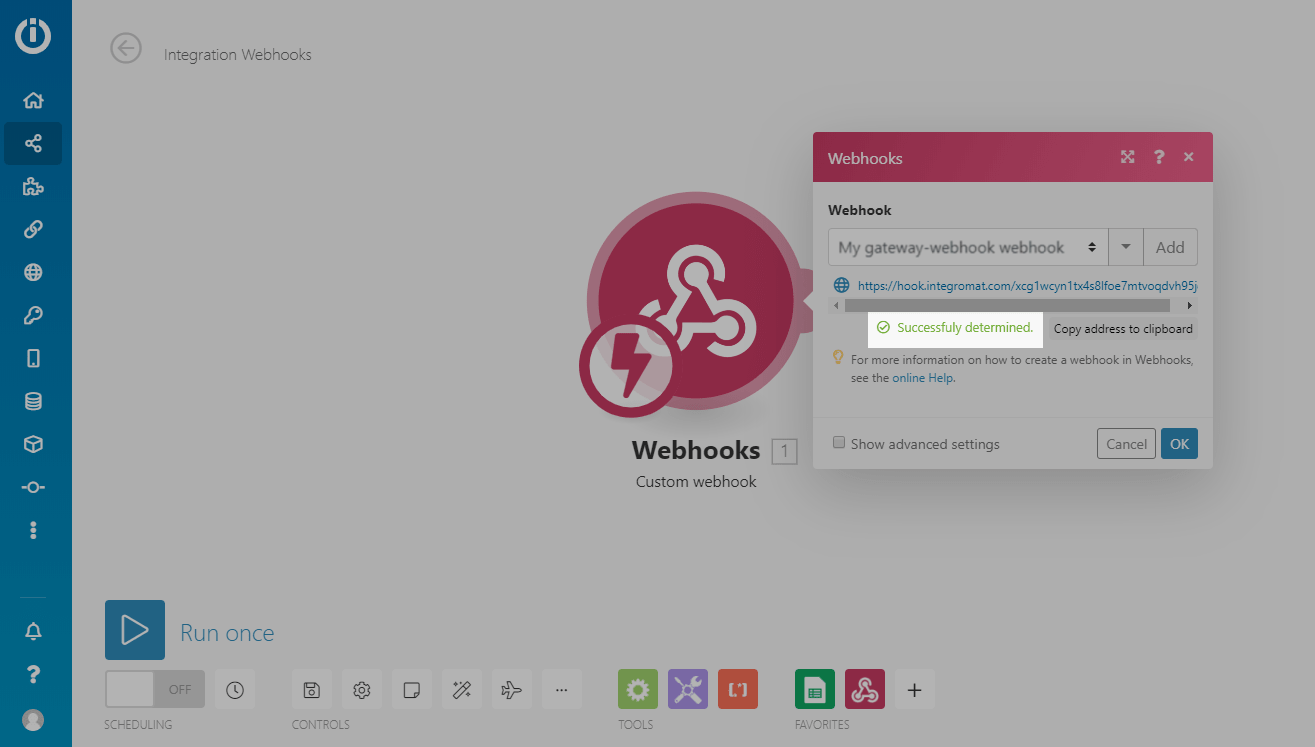
Your webhook has been created. Copy the link — you need to paste it into your chatbot flow.
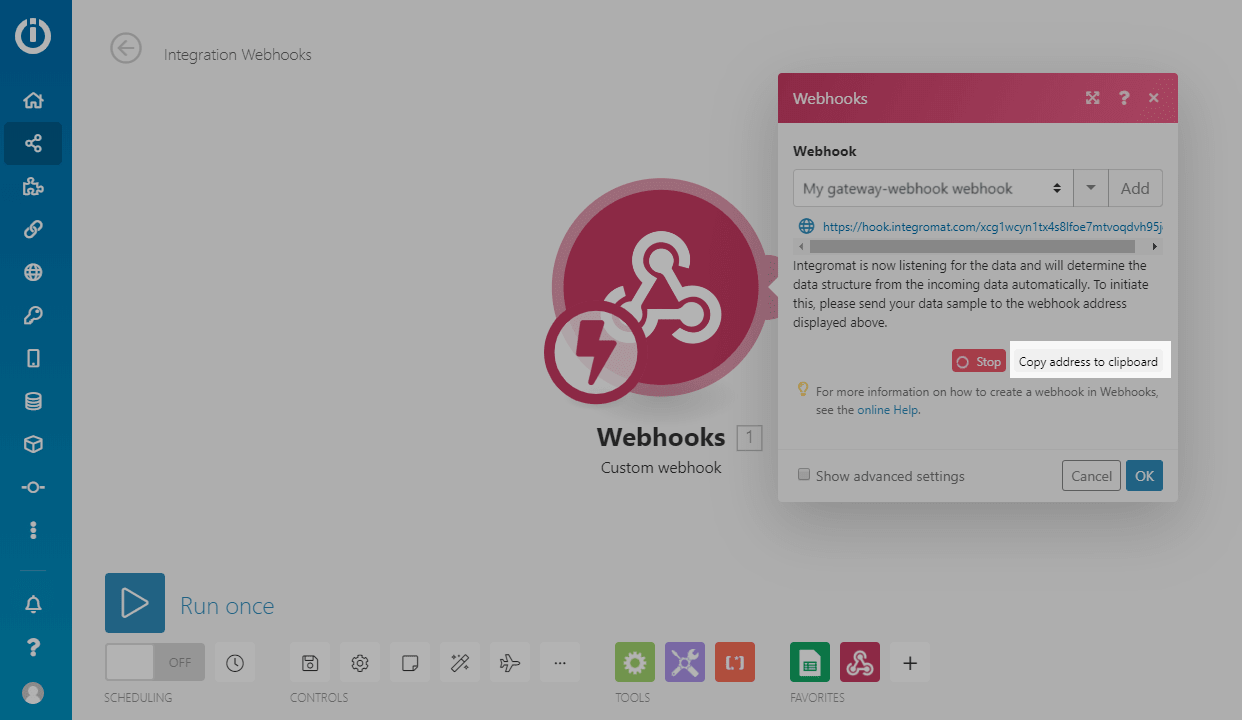
Now, Make waits to receive the first webhook to determine the data structure it will need to work.
How to Add a Webhook Link to a Chatbot Flow
Log in to your SendPulse account. Select the bot you need and open the flow in the chatbot flow builder.
Create a chatbot flow to enter data for verification and recording, such as name, contact details, day of the week, and time.
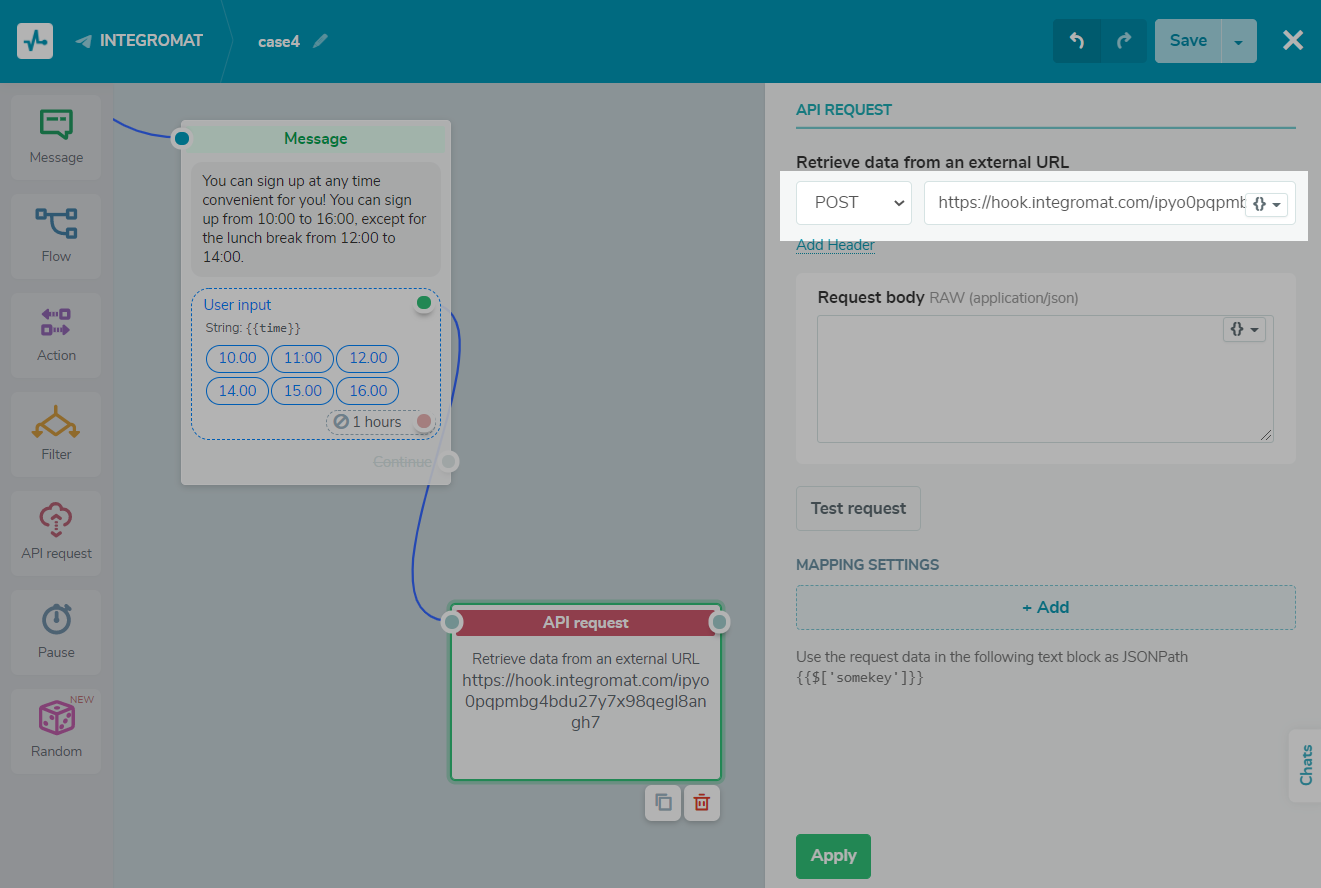
Add and place the "API Request" element right after the element you want to send the webhook. Select the "POST" request type, and enter the URL copied from Make.
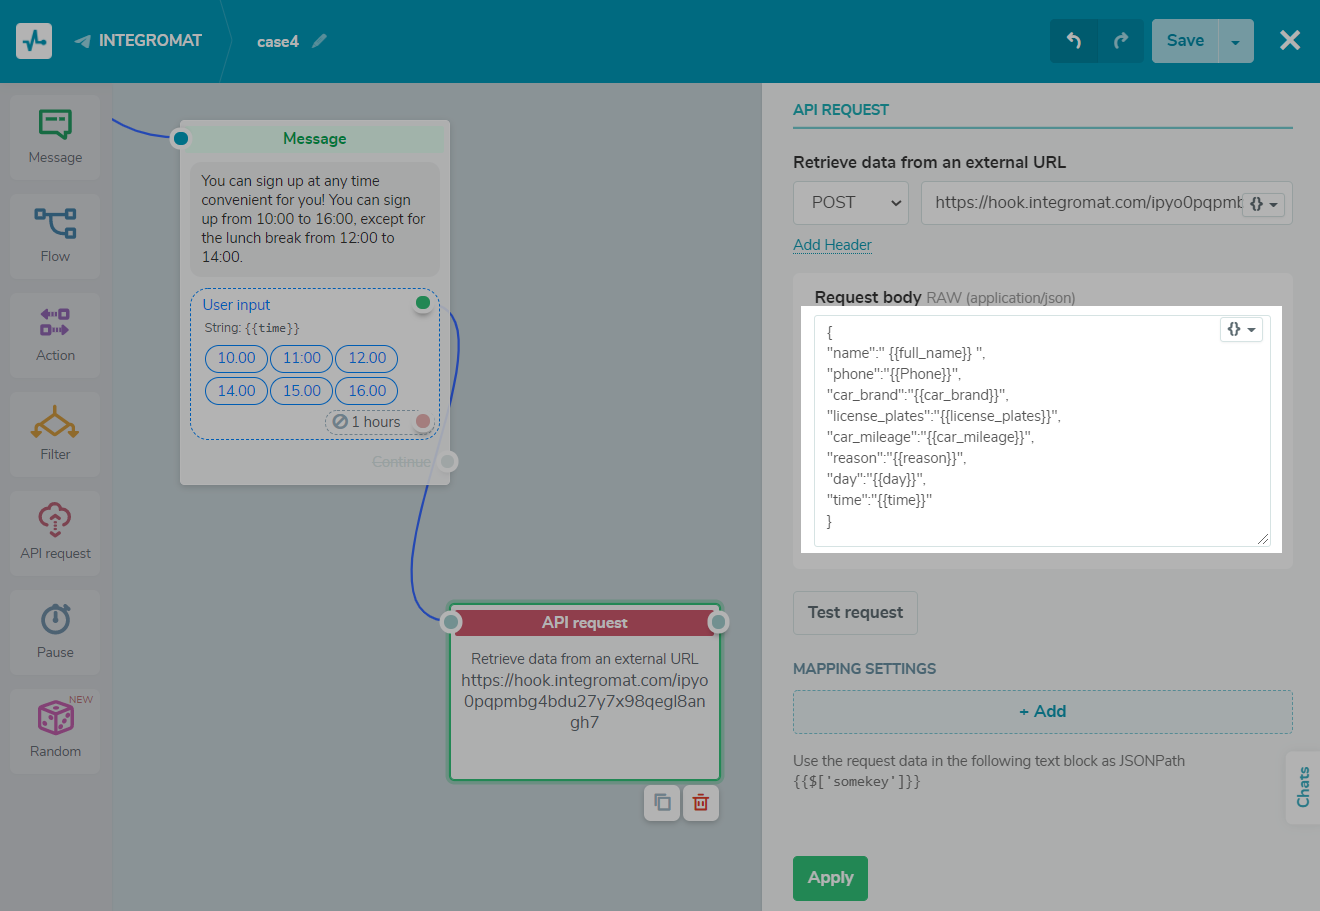
Insert the passed data into the request body. Here, you can use the variables of your chatbot with the data requested from the user in the previous element of the scenario.
Click the Test request button to send the request to Make so the system can recognize the received data structure.
When Make receives the webhook, you will see a "Successfully determined" message in the "Webhooks" block.
How to Send and Receive Information from Google Sheets
This article covers integration with Google Sheets using Make (Make). Still, you can also get data from Google Sheets directly with only the Google Sheets API and SendPulse tools. Read more: "How to Transfer Data from Google Sheets to Chatbots."
Now, in Make, we need to build a scenario that checks our Google Sheets for the requested date and time of the booking request from a client. If the requested cell is available, we will write the user’s in it. If the cell is occupied, we will return the answer that the time slot is booked and the client needs to choose a different time.
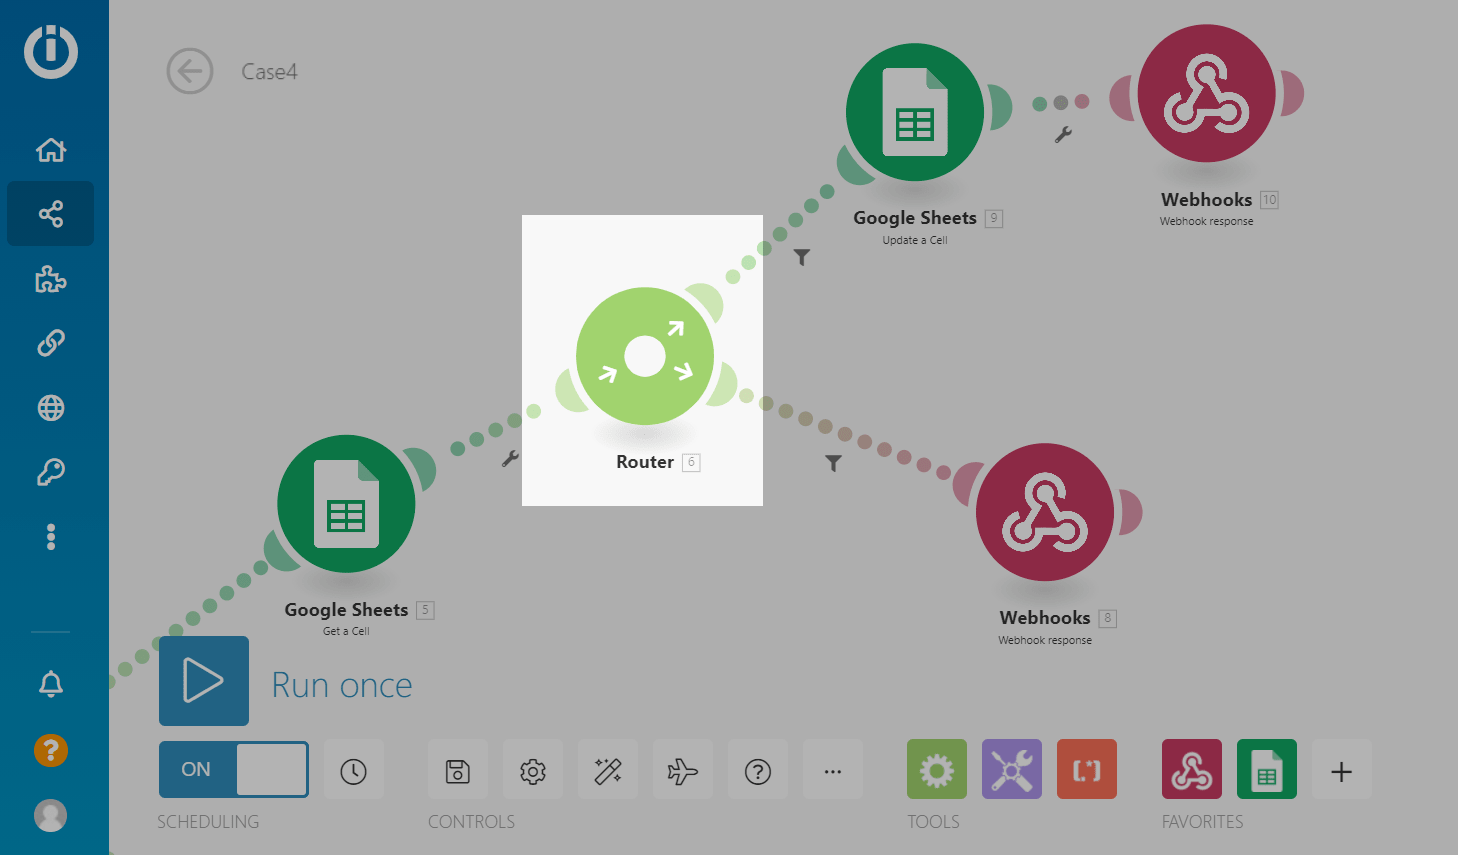
We will use the following blocks in the scenario:
"Router" — helps branch the scenario; each route will have its own "Filter" applied (by days: "Monday", "Tuesday" and so on, then by the booking time: "10", "11" and so on, then by the status of the cell — available or booked).
"Google Sheets" — we will use the "Get a Cell" action to get information from the cell for the selected date and time, and "Update a Cell" to write data to the selected cell if it is empty.
"Webhook" — we will use the "Webhook response" action to send a response message back to the chatbot.
Adding a Router for Day Division
Using a router, you can branch your scenario into multiple routes, process the data in different ways, and filter the data passing along the route.
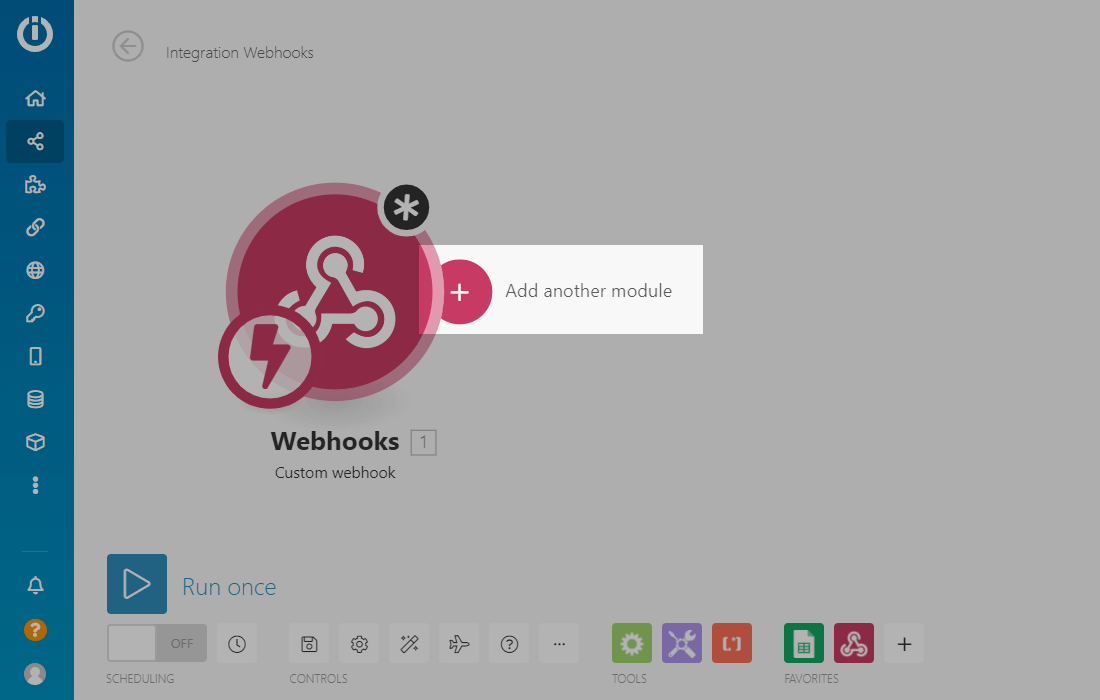
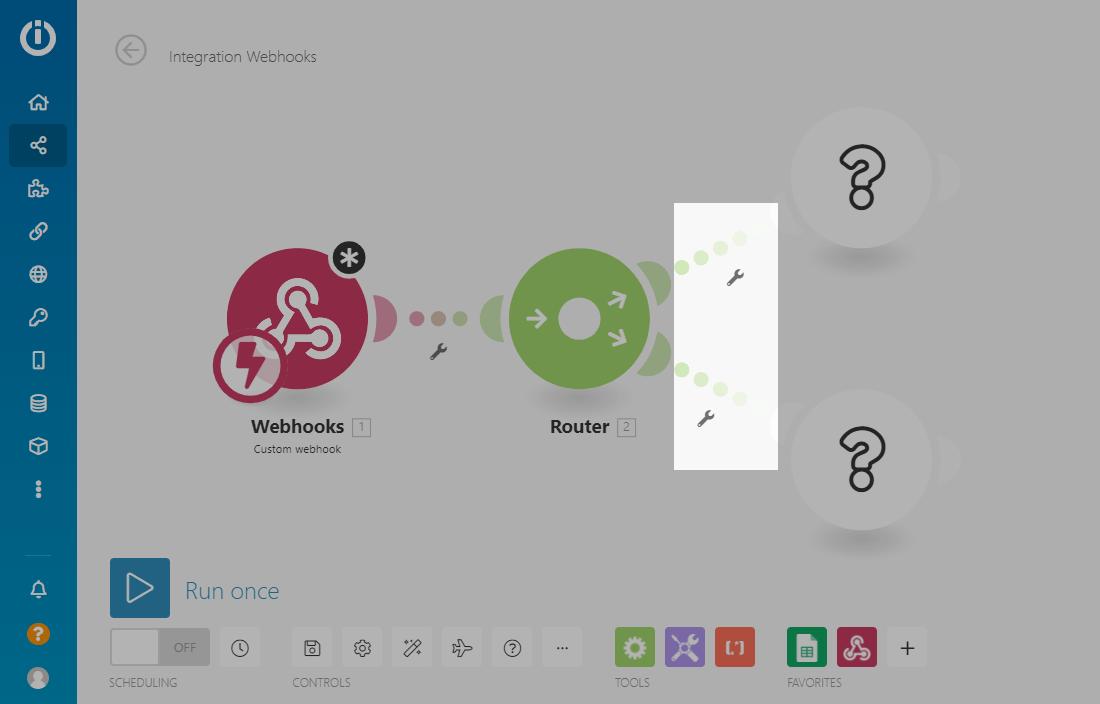
To add a router, click on "Add another module" next to the "Webhook" trigger block.
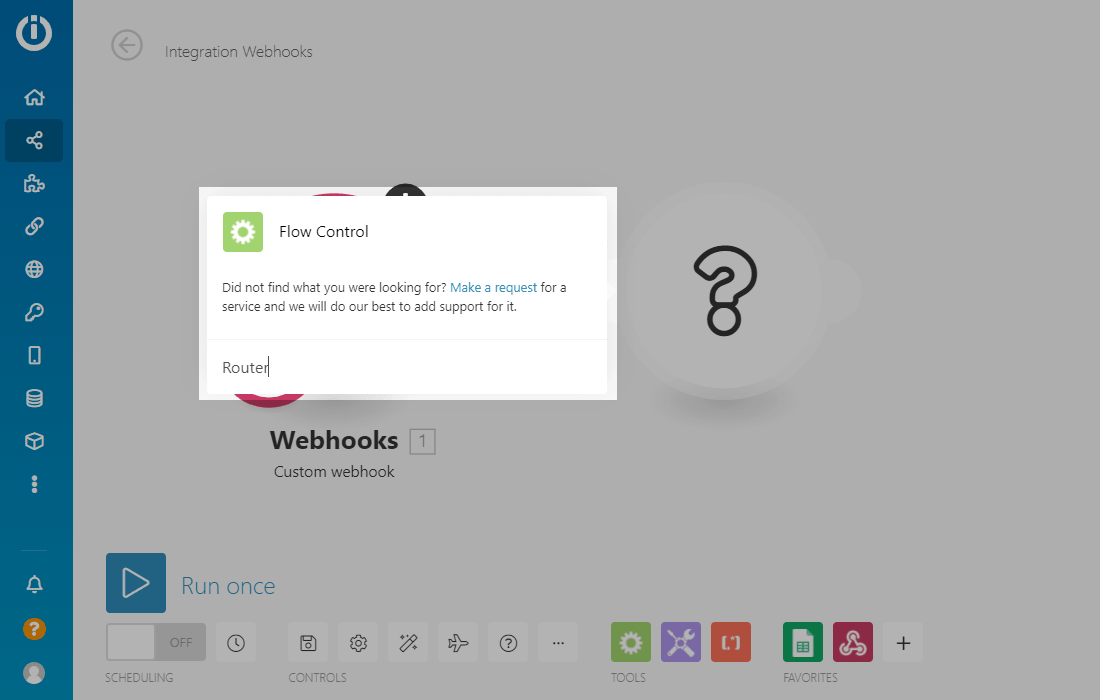
Enter "Router" and select "Flow control."
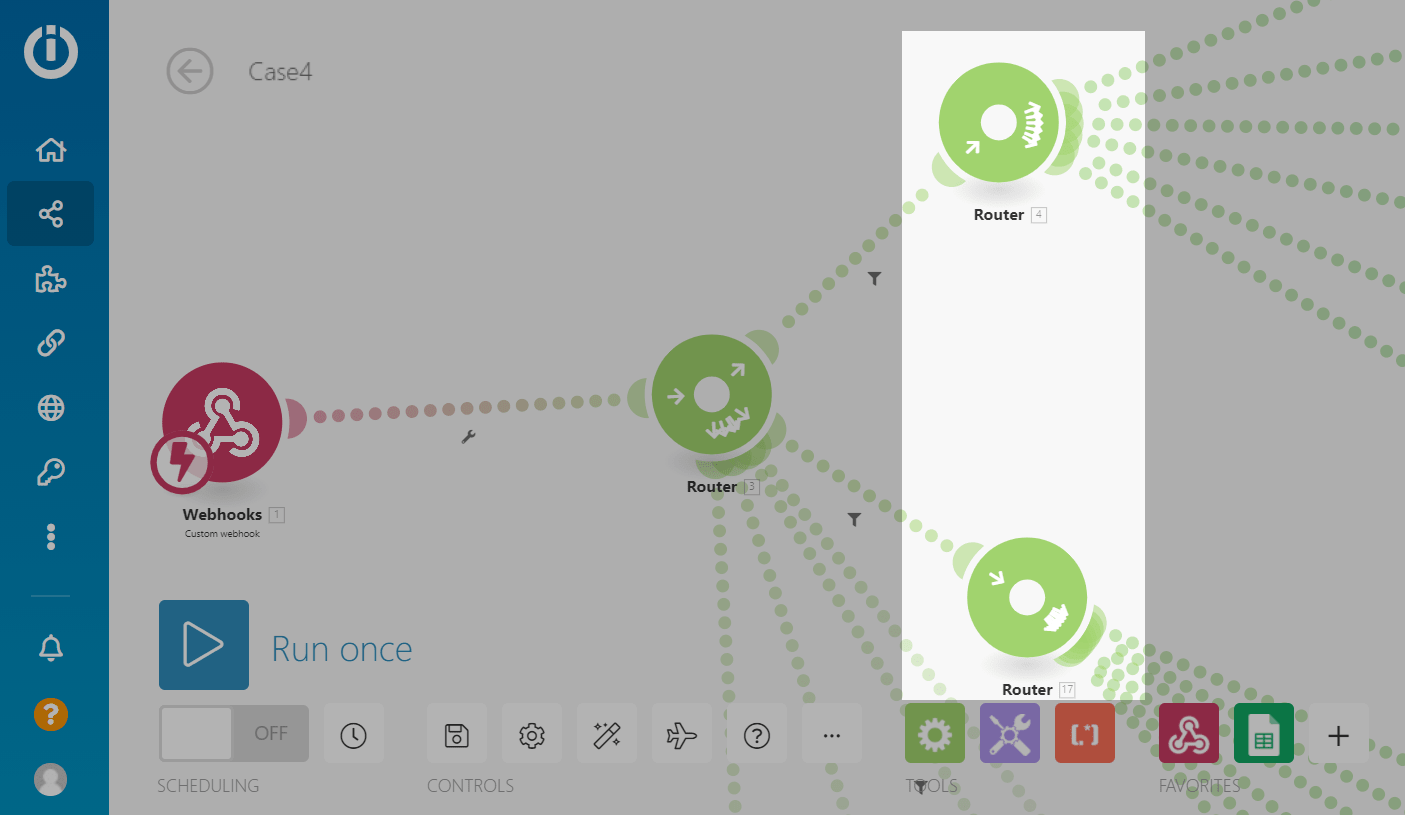
This is how we added the first router that will divide the scenario into days.
Adding a Router for Hours Division
You need to add more routers for each desired hour of each day of the week to add hour division.
Setting Up a Filter by Day
The first router branches the scenario by days — this means that between the first and subsequent routers, you need to set up filters with the condition that the values match the days.
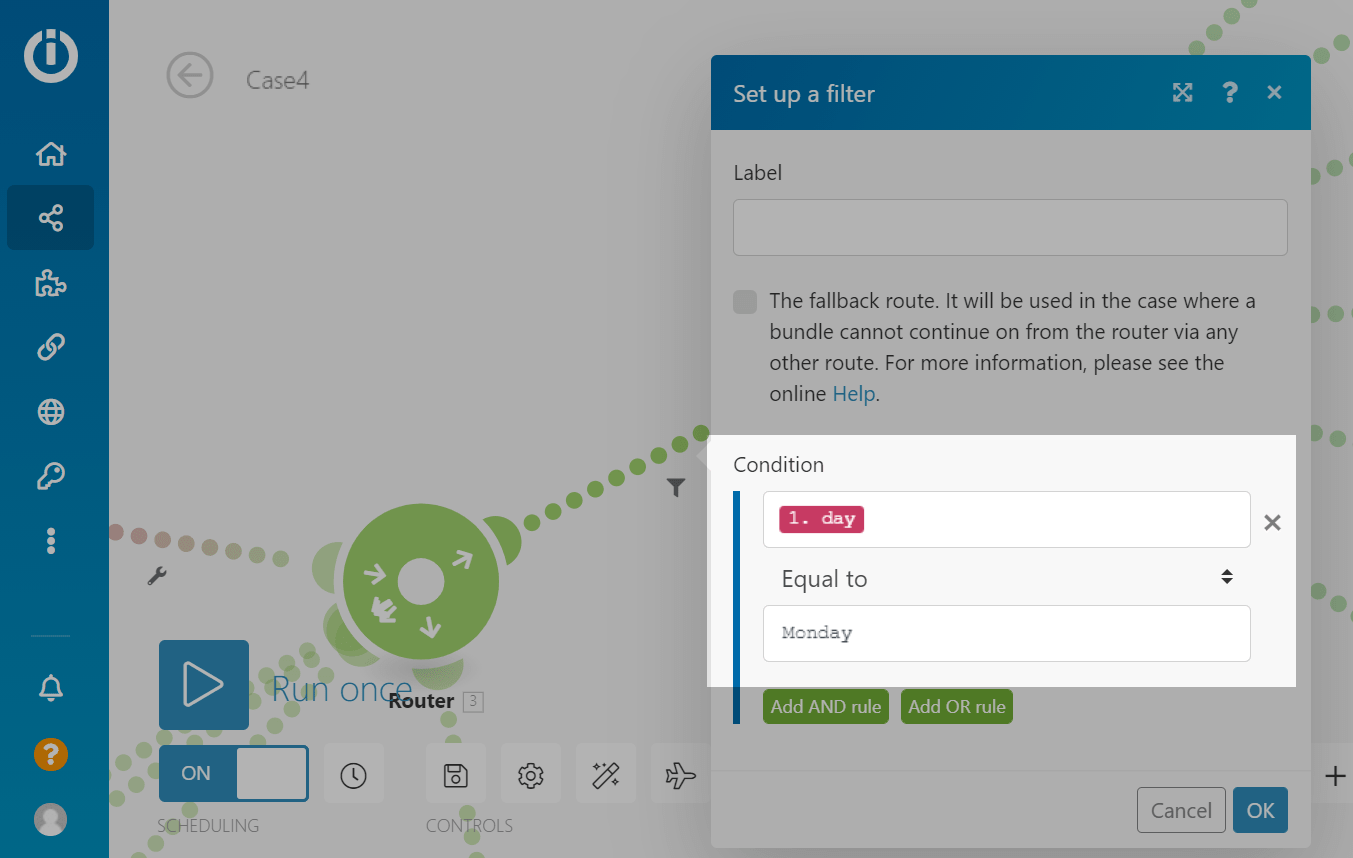
To configure the filter, click on the wrench icon next to the router block.
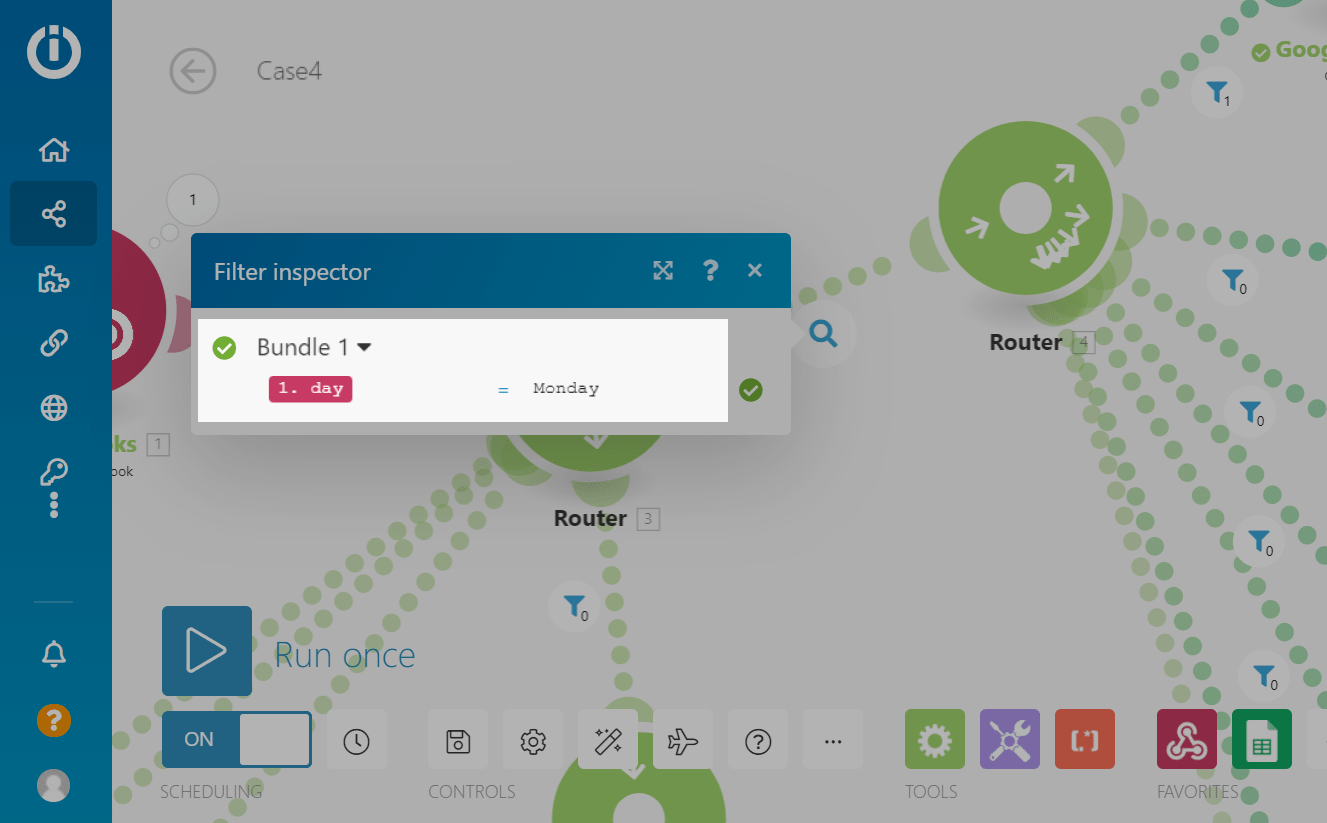
In the first field, select the day variable obtained from the webhook. In the second field, write the day of the week ("Monday" for the first filter). After entering the condition, click the OK button.
If you do not have a variable in the form 1.day (where 1 is the block number in Make, in which you received this variable from the chatbot), click the Run once button in the bottom left corner and start the flow in the chatbot you configured the webhook for.
You need to duplicate the first router, indicating your working days in the second field: "Tuesday," "Wednesday," and so on.
Setting Up a Filter by Hours
To install this filter, you must first add the "Google Sheets" block.
The second router (the second, if you look at the linear connection from the first "Webhook" trigger block) branches the scenario by the hour. This means that for the second router and the subsequent block from "Google Sheets," you need to set filters with the hour condition.
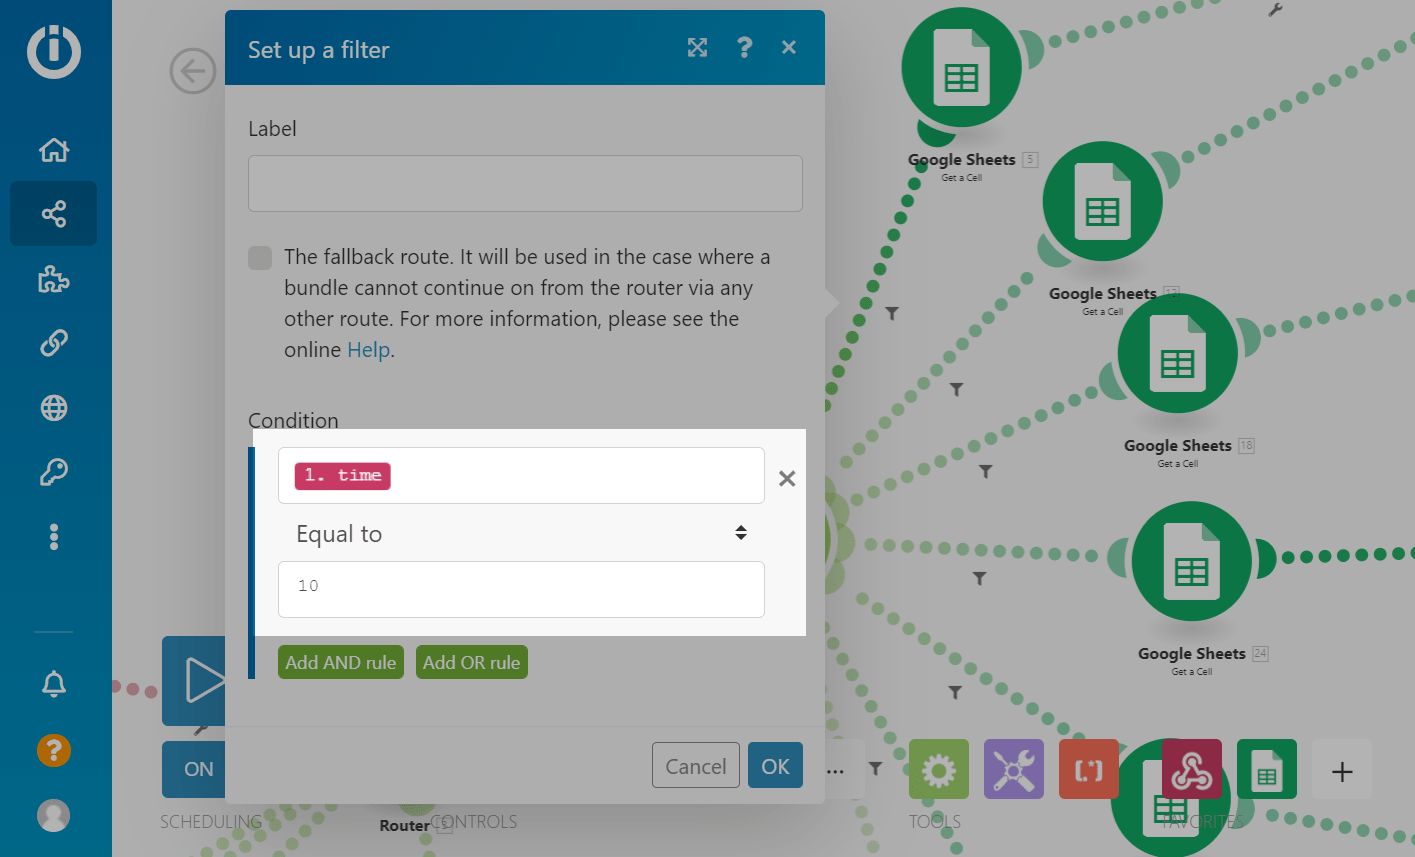
To configure the filter, click on the wrench icon next to the router block.
In the first field, select the time variable obtained from the webhook.
In the second field, enter the hour. In the first filter, we have "10". After entering the filtering condition, click the OK button.
If you do not have a variable in the form 1.time (where 1 is the block number in Make, in which you received this variable from the chatbot), click the Run once button in the bottom left corner and start the flow in the chatbot where you configured the webhook.
You need to duplicate the second router, indicating your working hours in the second field: "10," "11," and so on.
Adding Cell View to Google Sheets
The next block after two routers with filters by day and hour will be "Google Sheets." Each "Google Sheets" block will be responsible for a specific cell in your Google Sheets document.
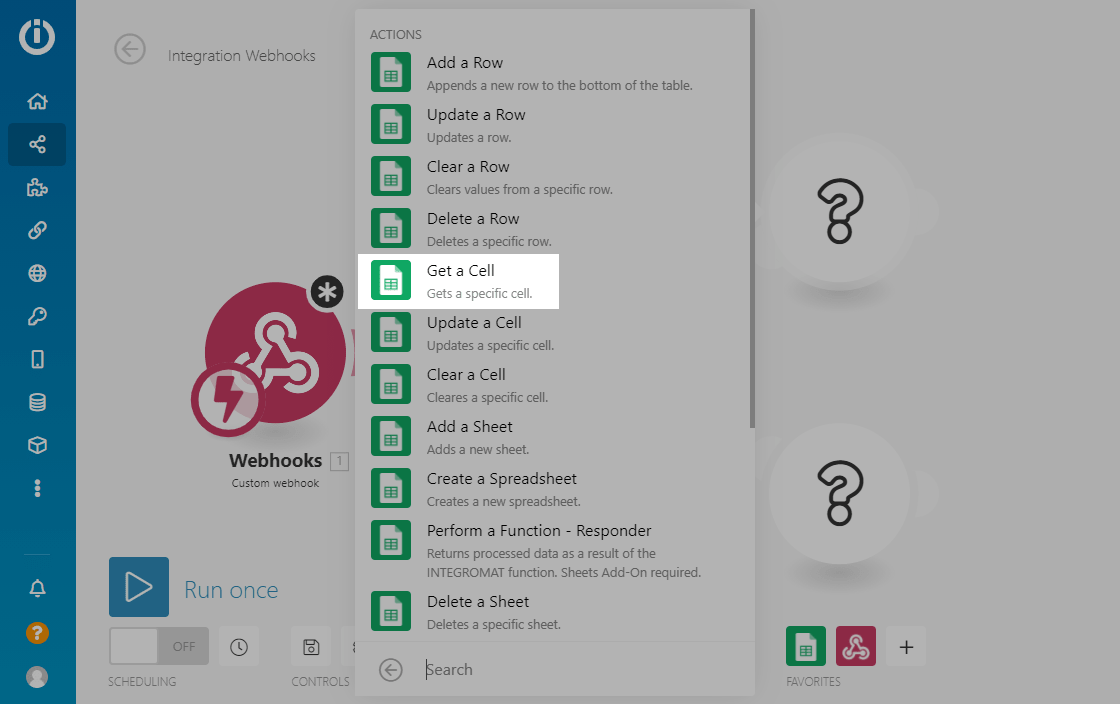
Click on the question mark or "Add another module" next to the current block and select "Google Sheets" with the "Get a cell" action.
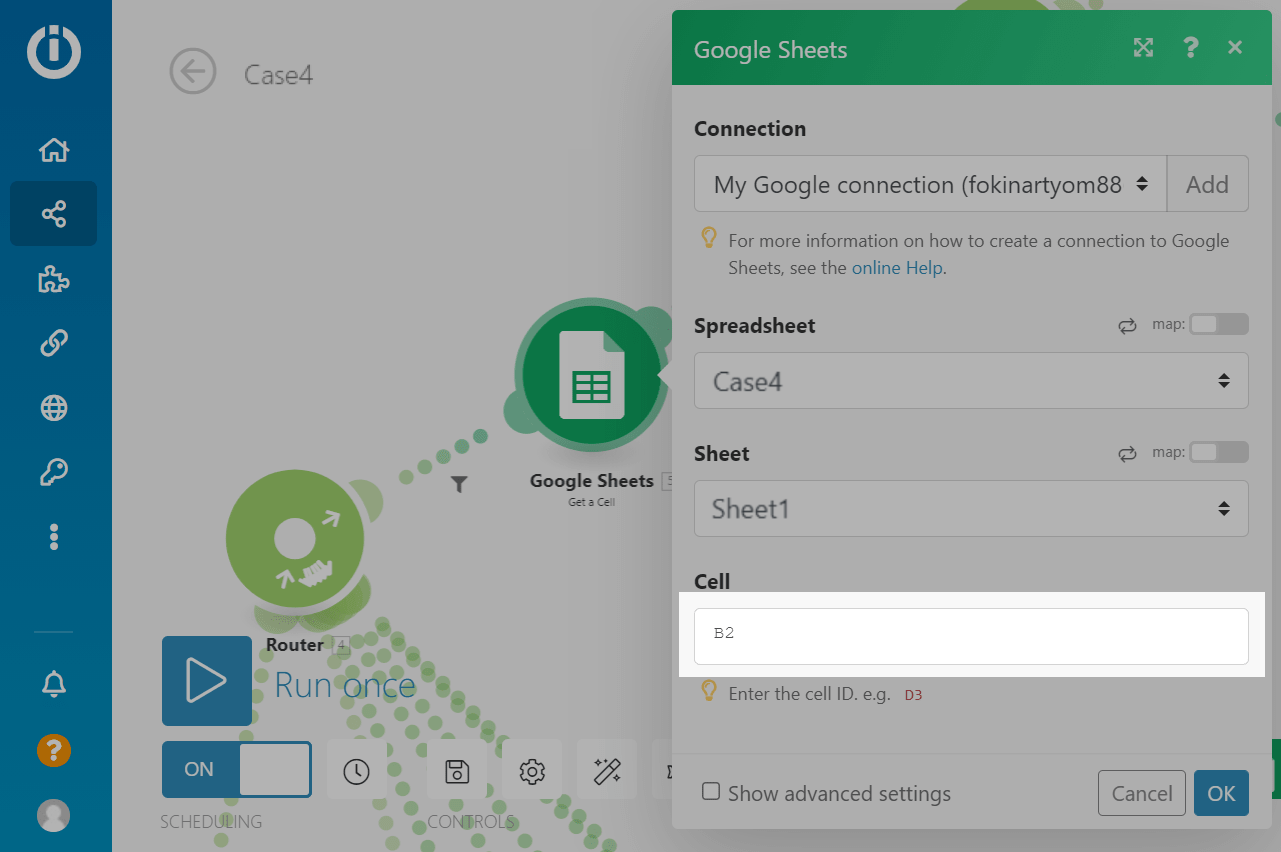
Connect your Google Account, select a spreadsheet and sheet, then, click the OK button.
Before closing the page, check your entire script so that each day of the week and time has its unique cell — they should not be repeated.
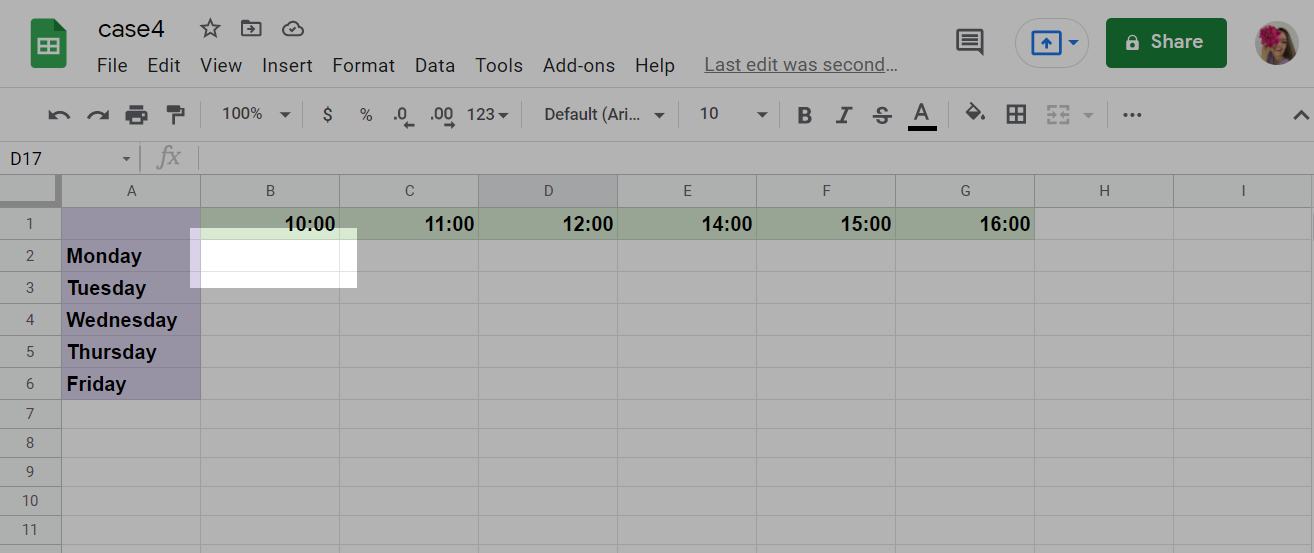
Our first cell will be B2 — the intersection of "Monday" and "10:00."
An example of a cell that will validate a record (and write data if the cell is empty) in Google Sheets:
Adding a Router for Dividing the Cell Check Results
Now we need to split the scenario into branches: based on whether the cell is empty or not.
Click on "Add another module" next to the "Google sheets" block with the "Get a cell" action and select "Router."
Adding a Cell Occupancy Filter
To be able to adjust the filter, first add the following blocks.
To check if the cell is empty, compare the value (equal to) obtained in the "Get a cell" element with a blank value in the filter parameters.
Click on the line between "Router" and "Google Sheets" with the action "Update a Cell" and set the condition. In the first field, select variable 5. Value — the received value from the requested cell in the "Google Sheets" block with the "Get a Cell" action.
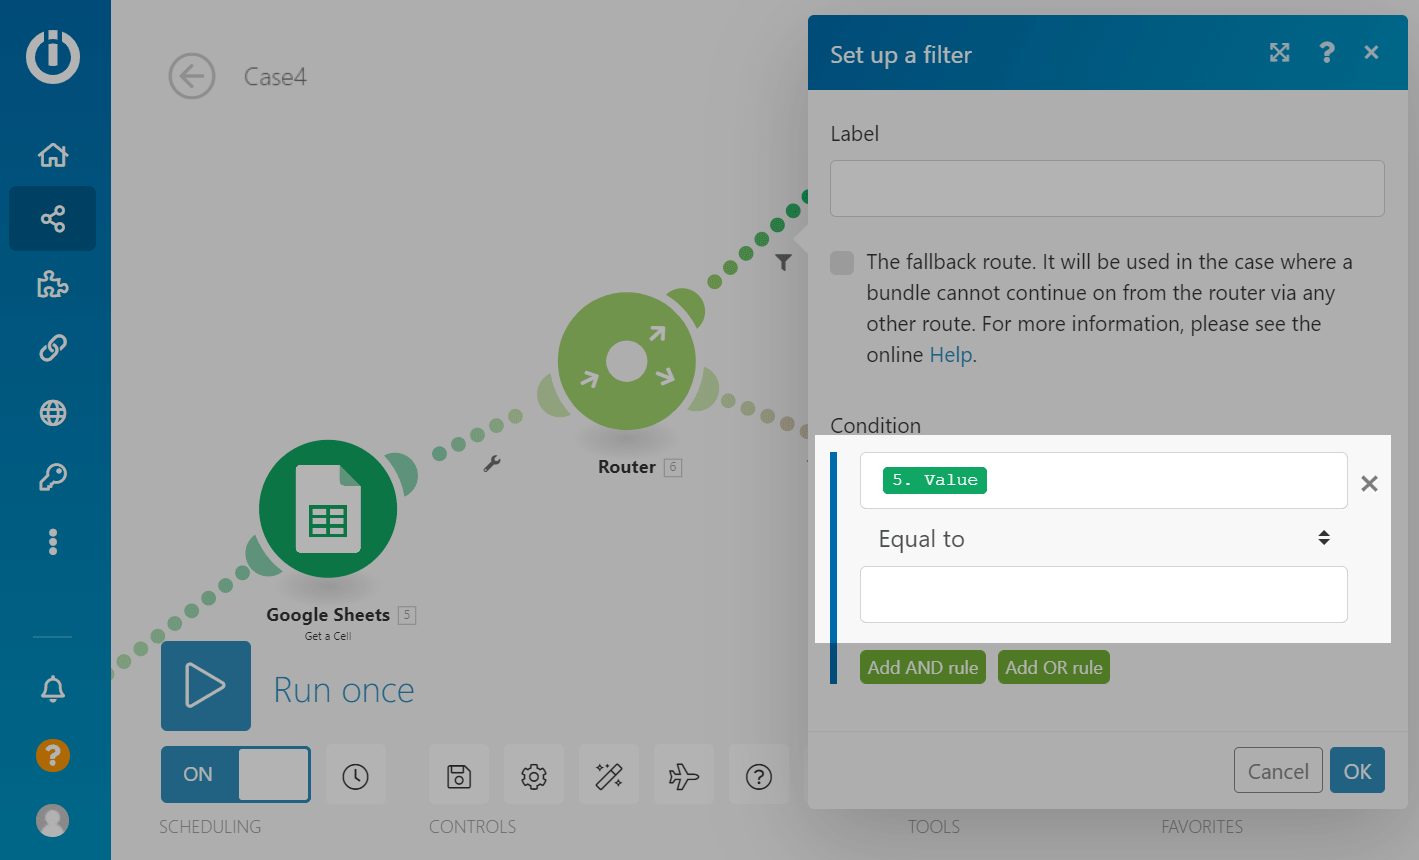
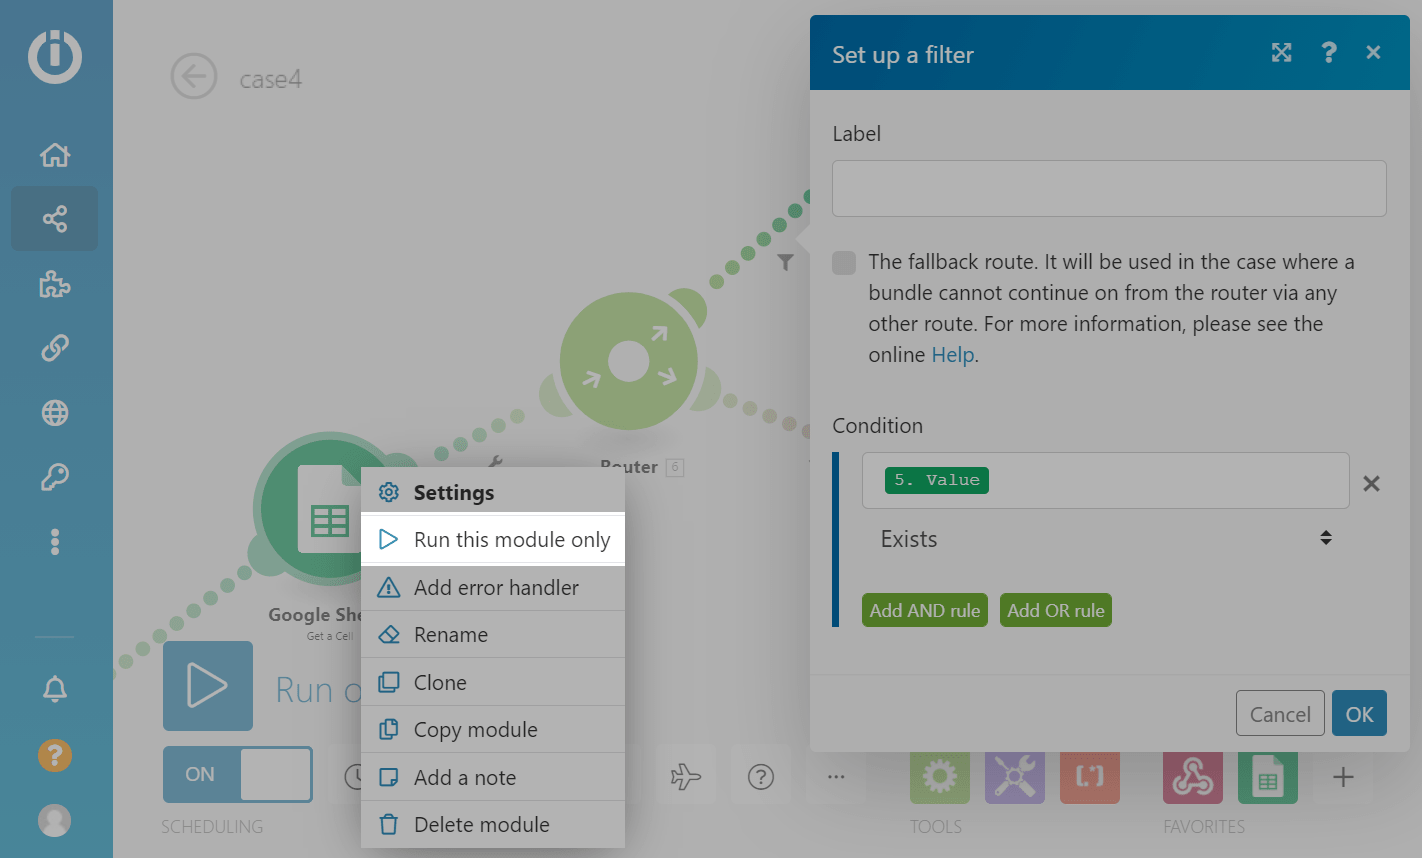
If you do not have a variable in the form 5.Value (where 5 is the block number in Make, in which you received this variable from the chatbot), click on the required "Google Sheets" block with the action "Get a Cell" and select "Run this module only."
Adding a Router for an Empty Cell
This branch with the data update blocks in Google Sheets and the response about the successful booking will run if Make receives a response that the cell is empty after the filter.
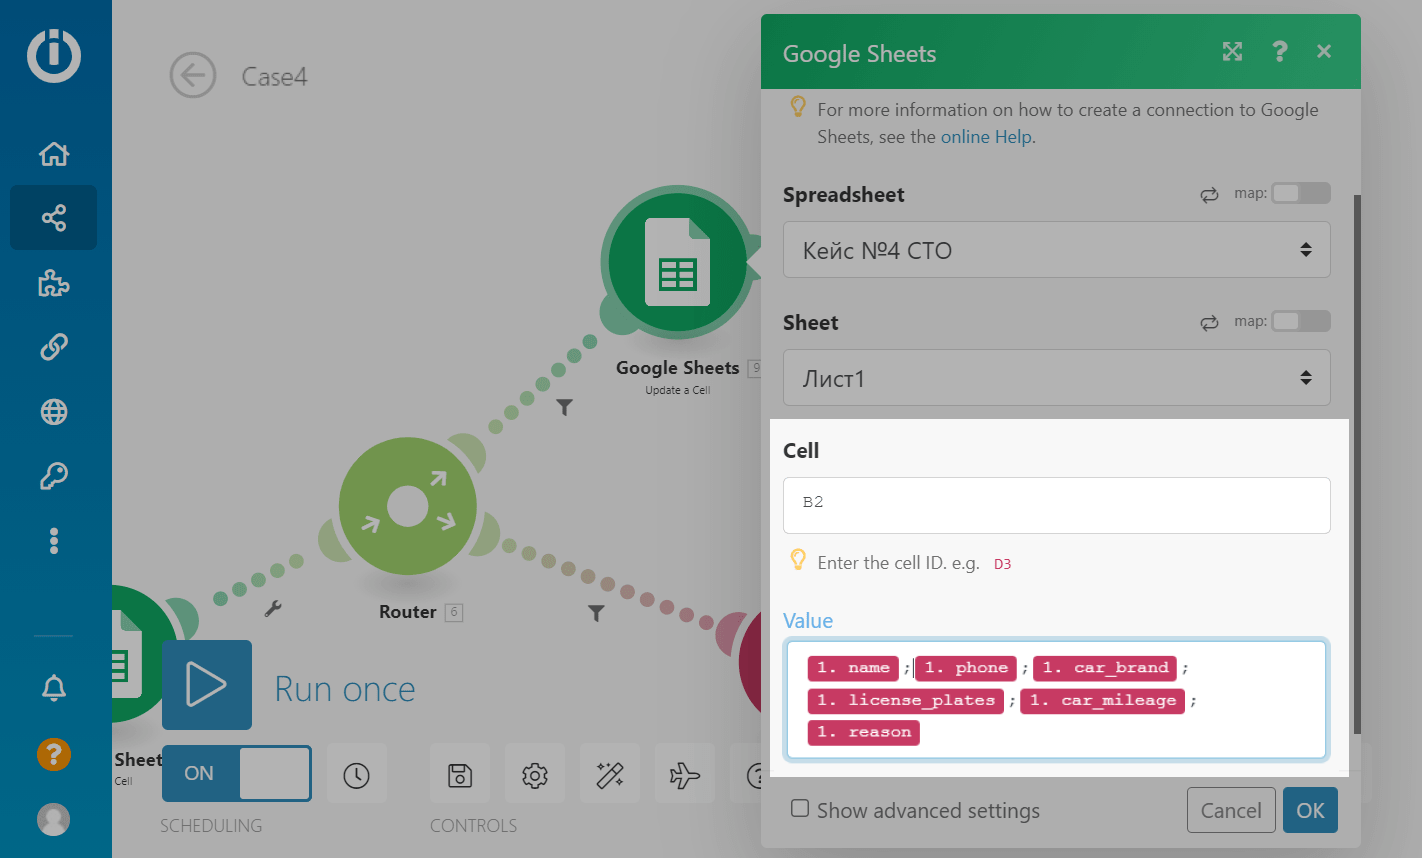
Click "Add another module" near "Router" and select "Google Sheets" with the "Update a Cell" action.
In the "Cell" field, enter the same cell that you entered for this branch in the "Google Sheets" block with the "Get a Cell" action.
In the "Value" field, enter the text you want to write to the cell. This can be a name, contact details, or any other useful information when making a reservation. You can also add your text or format the current one.
Next, after the "Google Sheets" block with the "Update a Cell" action, add "Webhook - Webhook response."
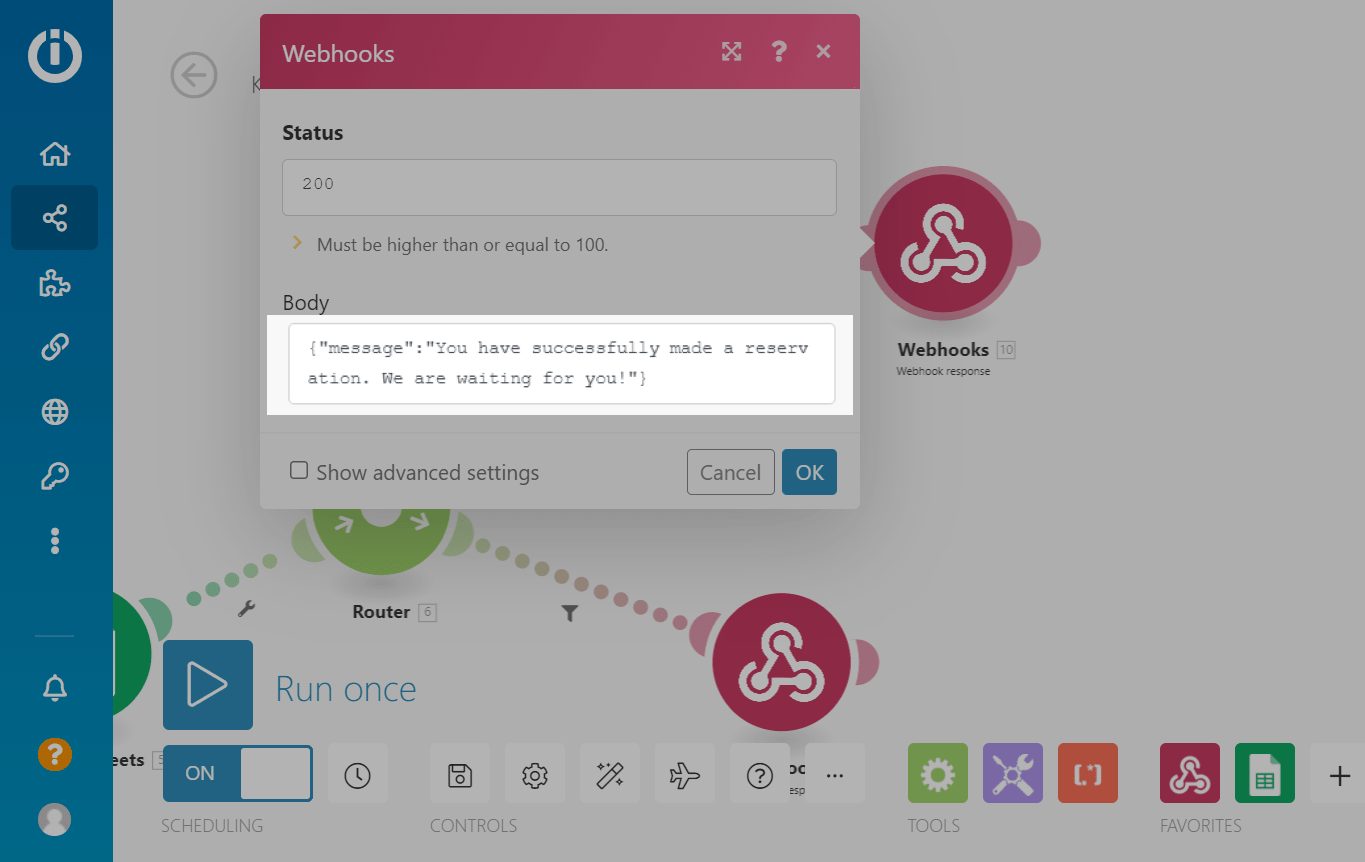
In the webhook response body, enter a message in JSON format.
For example:
{"message": "You have successfully made a reservation. We are waiting for you!"}This message will be sent back to the chatbot via the "API request" element, which you can write to a variable or send directly to a message via the JSON Path record.
You can also add variables to the response and send any other value that you write to a variable to the contact, by which you can filter and expand responses.
Adding a Router for a Occupied Cell
This branch with a response block about an occupied cell will run if, after the Make filter, it receives an answer that the cell is occupied.
Click "Add another module" near "Router" and select "Webhook — Webhook response."
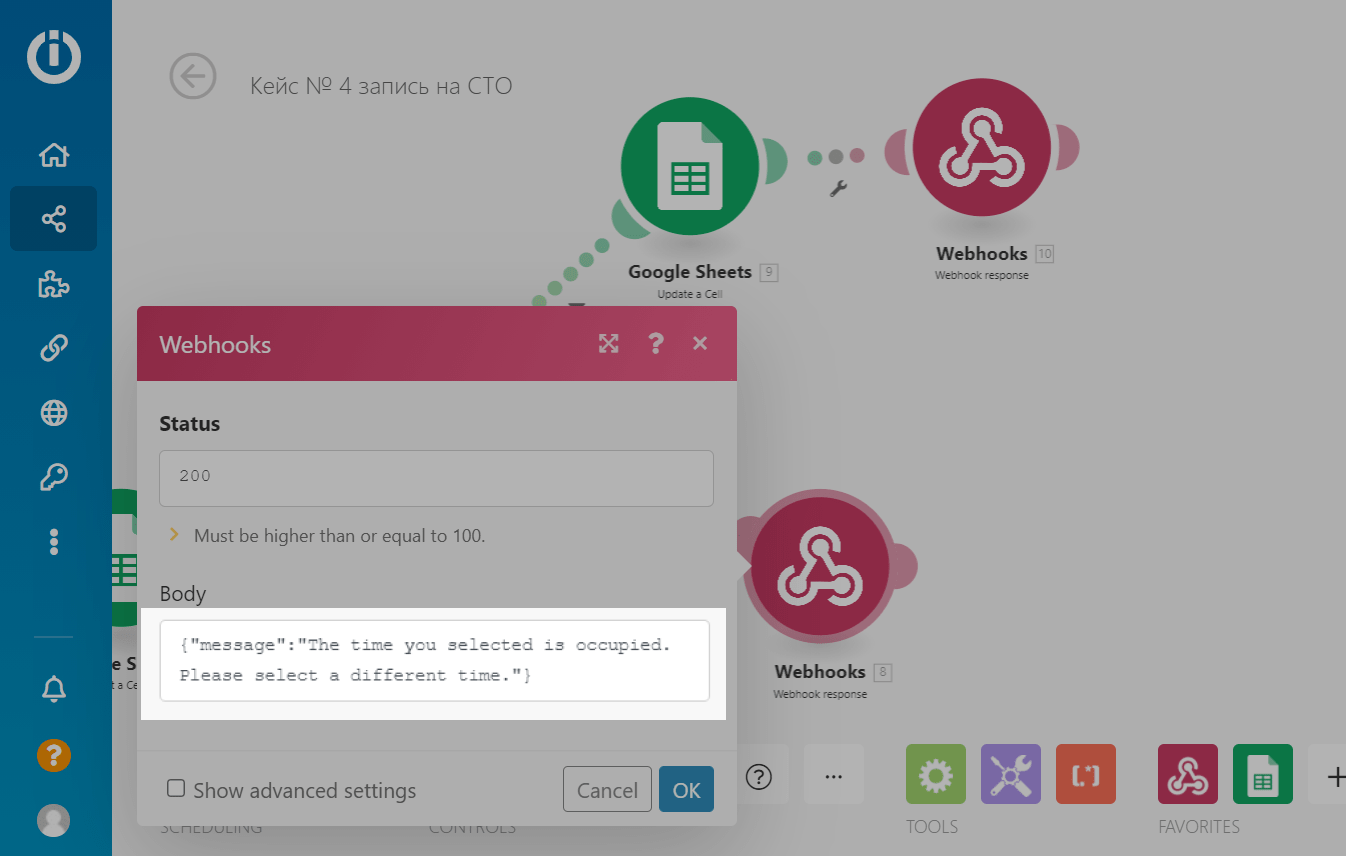
In the webhook response body, enter a message in JSON format.
For example:
{"message": "The time you selected is occupied. Please select a different time."}This message will be sent back to the chatbot via the "API request" element, which you can write to a variable or send directly to a message via the JSON Path record.
You can also add variables to the response and send any other value that you write to a variable to the contact by which you can filter and expand responses.
How to Send a Message with a Response to a User
Go back to editing your chatbot flow in your SendPulse account.
You can save the resulting value to a variable to use a filter and add it to the message as a variable. Or, you can display the data to the user once, without saving, using an expression like {{$['variable']}}. Read more: Using Data as a JSON Path Expression.

Place the "Message" element just after the "API Request" element, and add a variable or JSON path expression.
We recommend adding a "Filter" element before the "Message" element to check your response from Make. And, if the selected time is occupied, return the user to the time selection again.
You can also complicate the flow and combine it with another solution, where you can check the cells — to see which are free and which are occupied. Read "How to Request Cells in Google Sheets."
Save and Run
Before saving and exiting, ensure that everything works correctly.
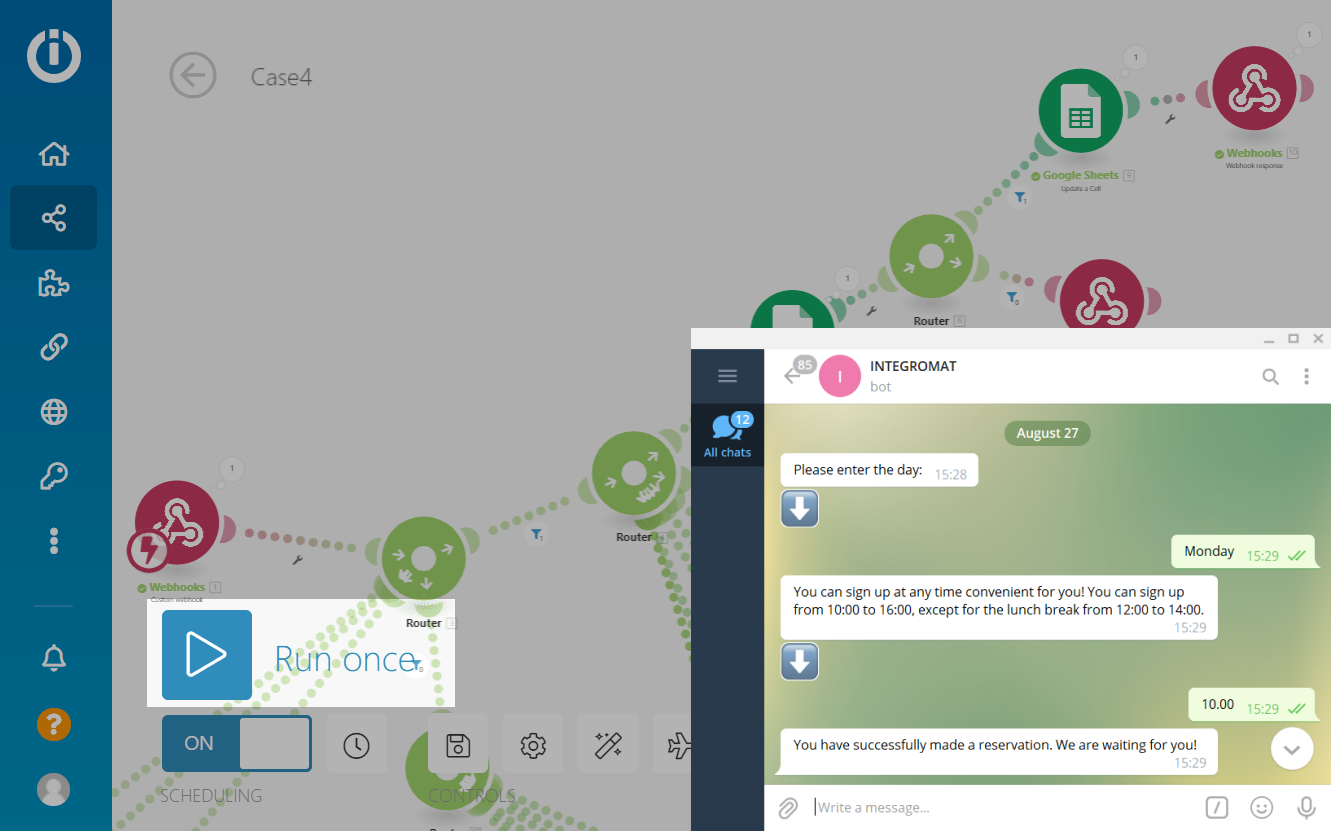
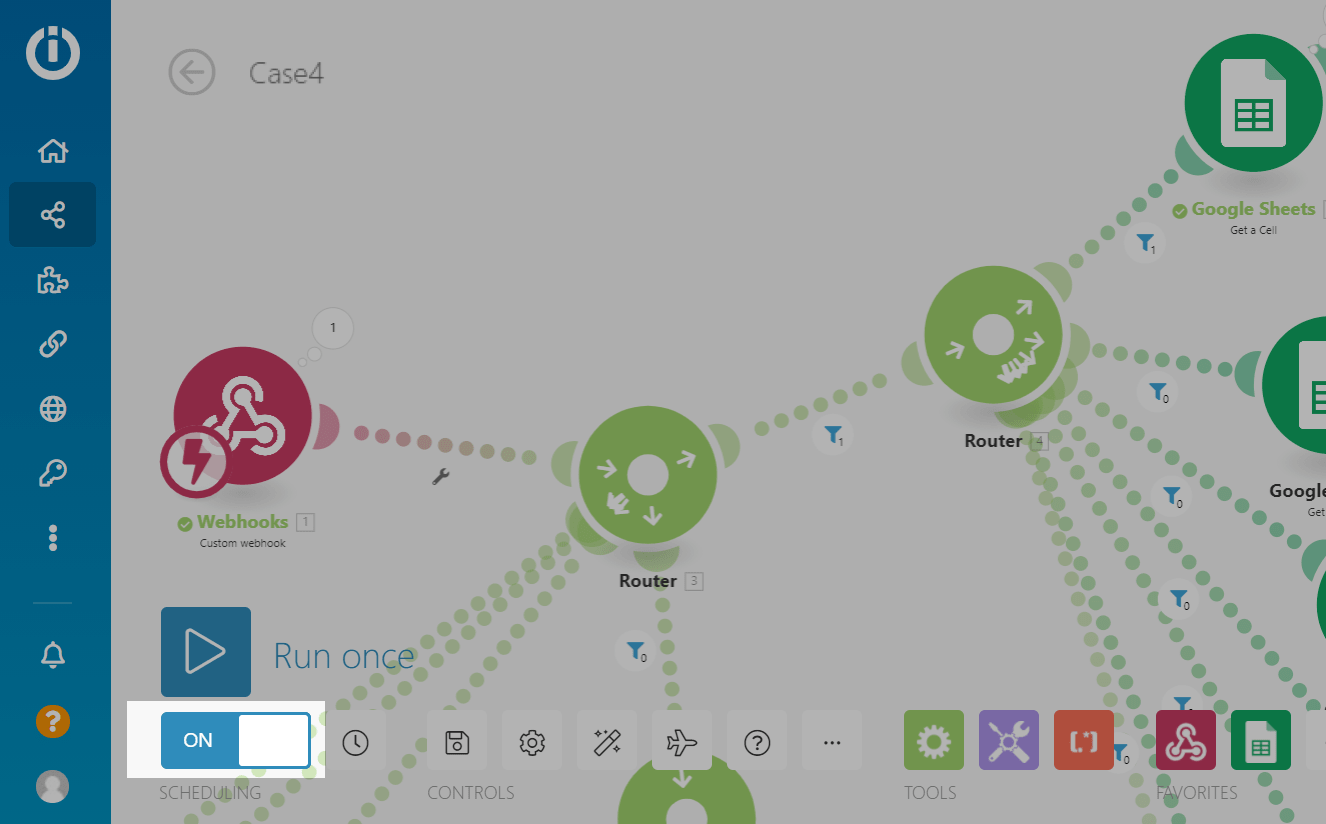
Click the Run once button and run the flow you configured the webhook for. If you have configured everything correctly, green check marks will appear under the Webhook and Google Sheets blocks.
Also, the activated filters will be highlighted in blue, and the "+1" values will be added to the filters that the contact passed to "Yes."
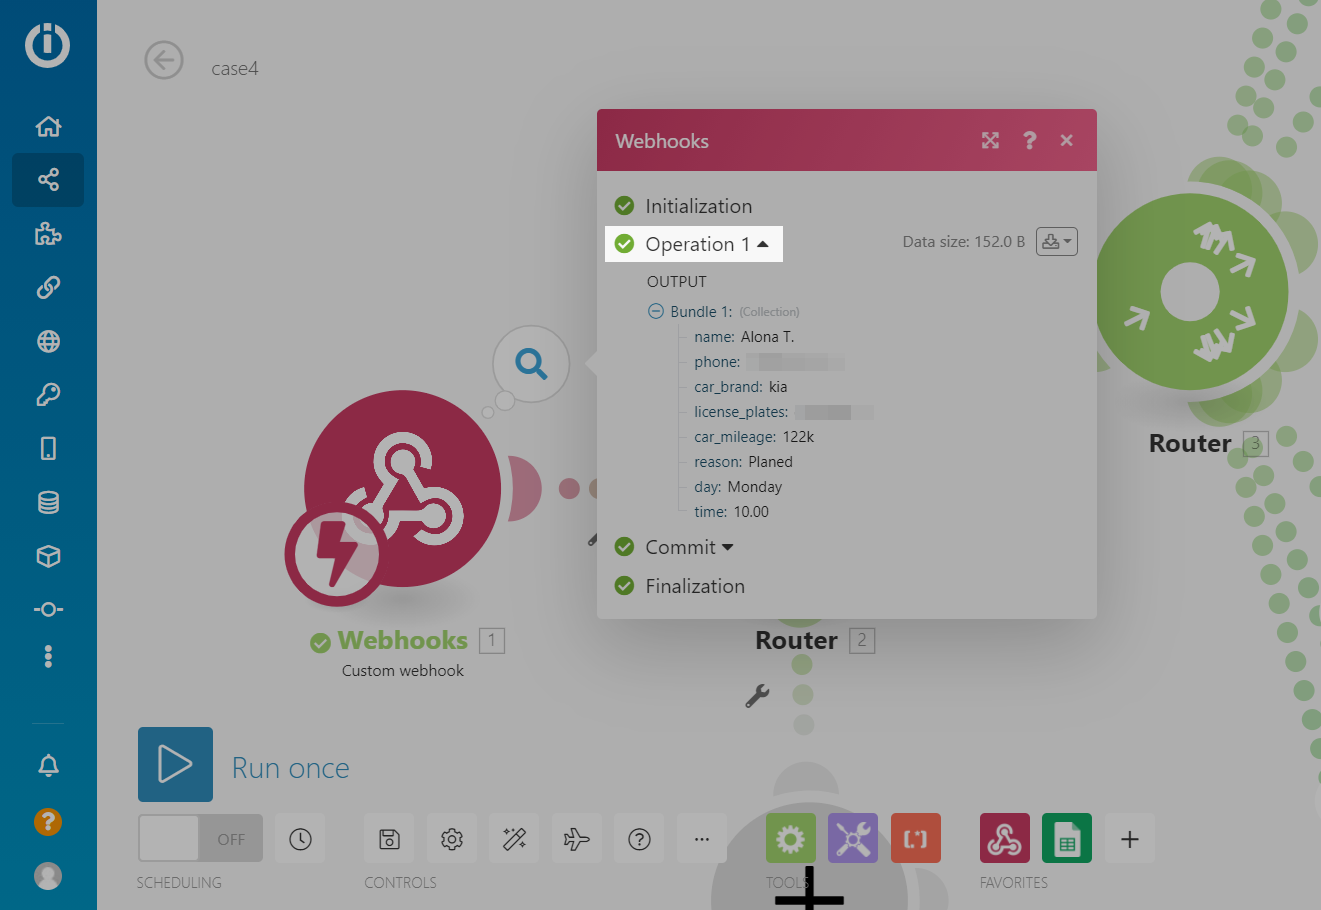
You can also click on the number above the block to view the received information passed to the next block.
Several operations can be performed after you receive data. They will be performed as many times as your Make pricing plan allows. Each operation will have contact data that you can track to other blocks.
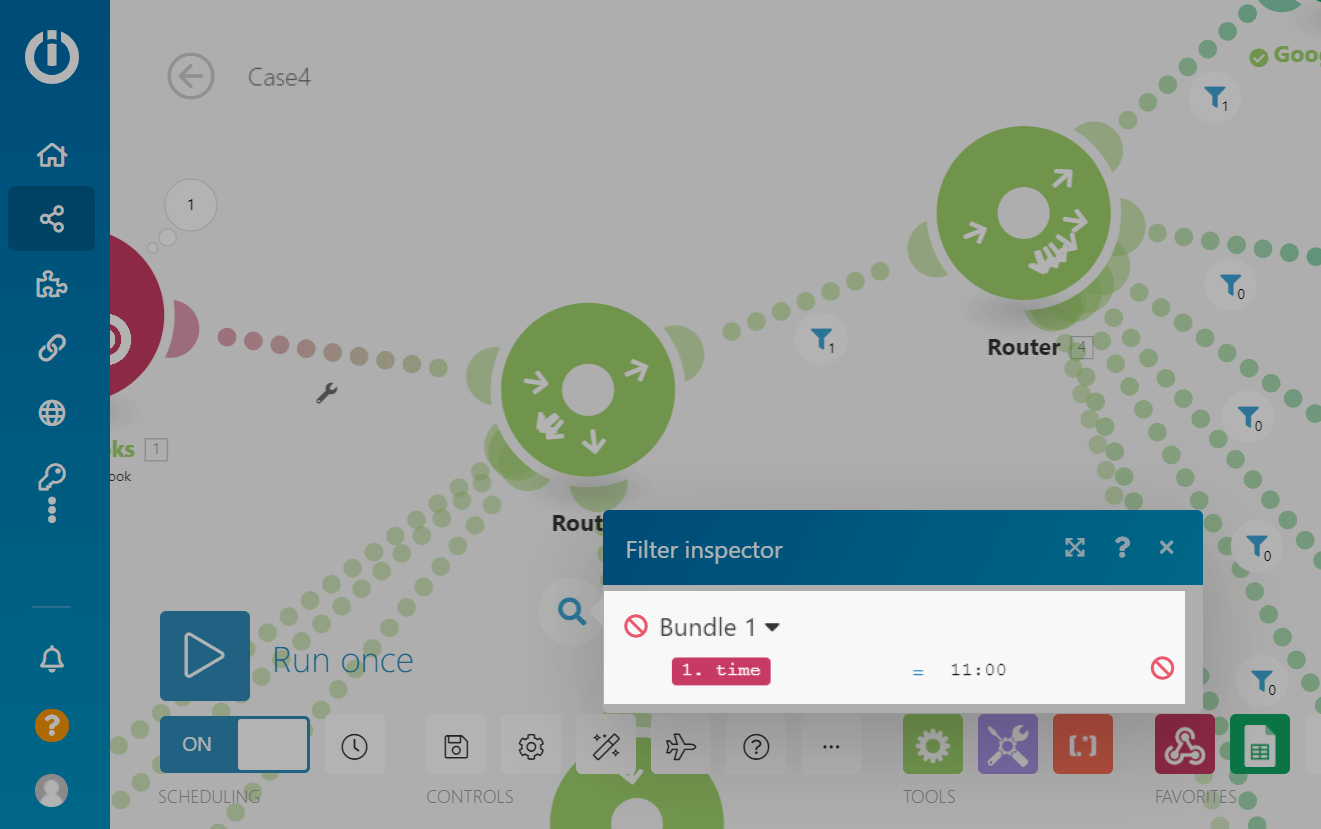
When you click on the filter, you can check how the contact under a certain operation went through.
If the contact meets the filter condition, a green check mark appears.
If the contact did not meet the filter condition, a sign appears that the contact did not pass the filter.
To activate the scenario, move the toggle switch to the "ON" position.
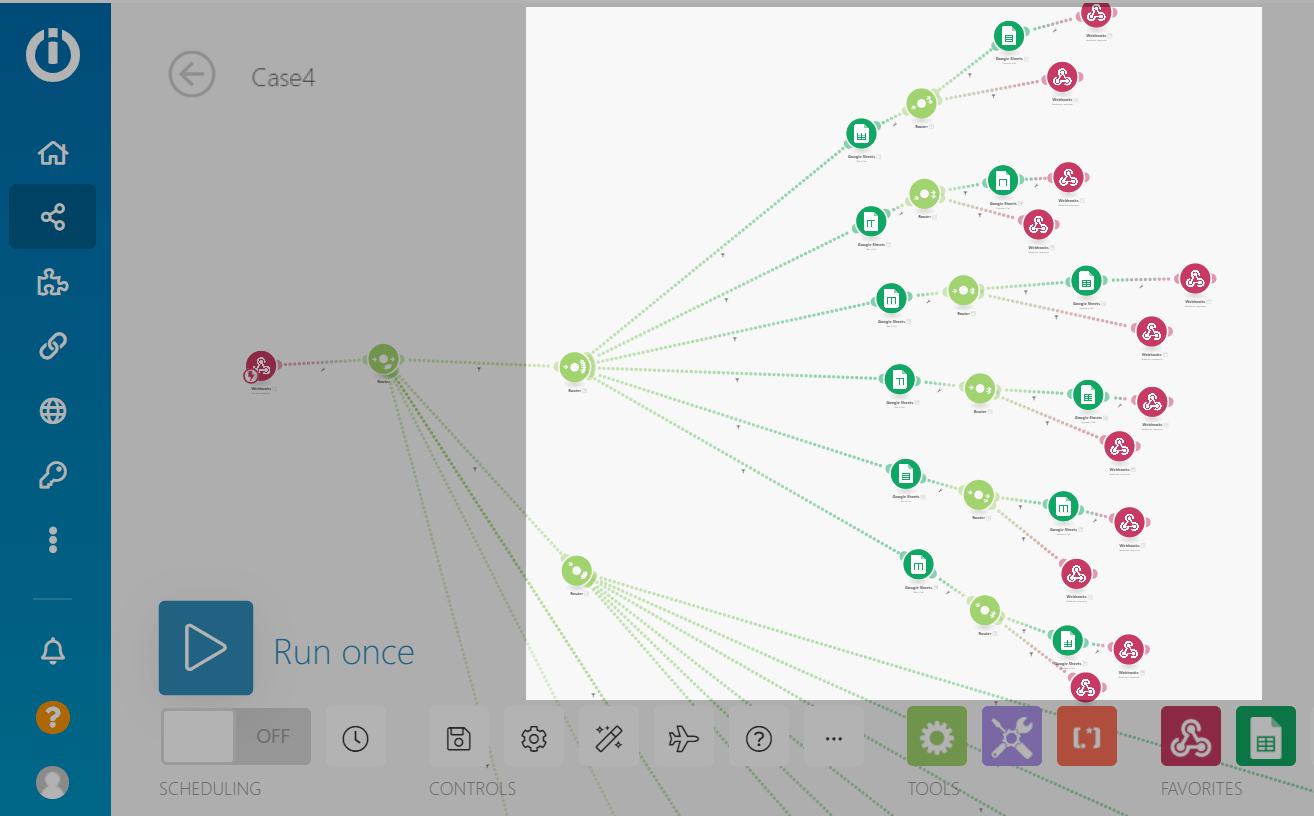
How to View Scenario History
Navigate to the scenario you need. You will have access to a diagram of all of blocks with their execution history. For each selected operation, you will be able to trace the user's path through the highlighted blocks.
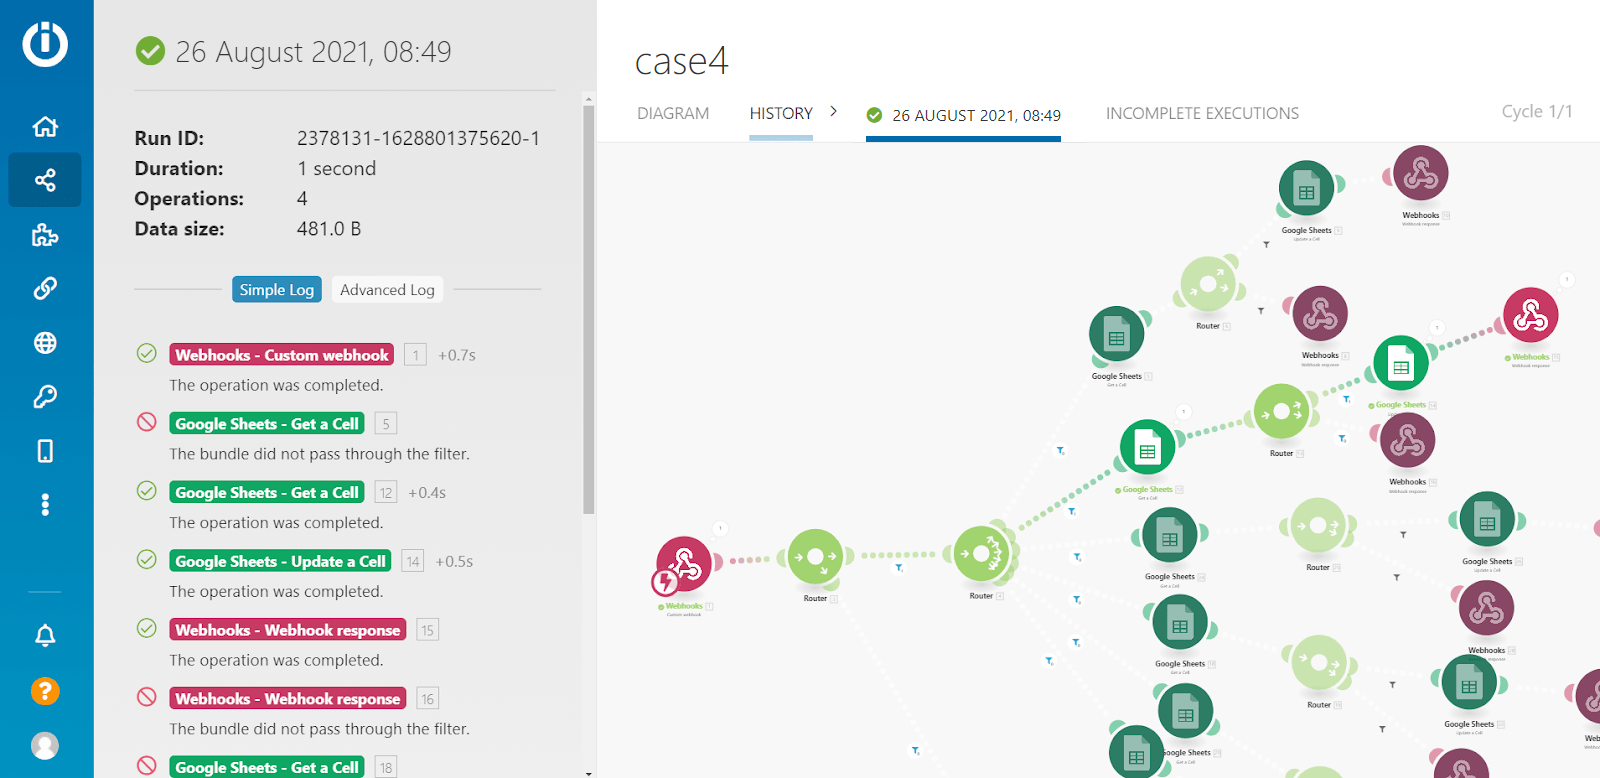
Click on the required block to view information about it. You will have access to all the information on the block: what values it received and transmitted further.
If any of the blocks have not been executed, they will be highlighted in red, and when pressed, the reason for the error and a hint on how to fix it will be displayed. Note that the entire scenario may pause and not execute until the error is resolved; operations will be queued.
If you have any questions about configuration or scenario failures, you can contact Make support.
Last Updated: 15.03.2023
or